Fixing a Flat Dallas DS1287 Real Time Clock Chip
The all-too-common 161/163 error
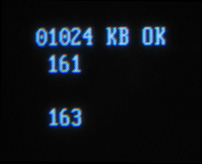 The screen error in the photo opposite will be recognisable to nearly all those who ever refurbished an IBM (or compatible) AT, or PS/2 computer. It's the dreaded 161/163 error meaning the CMOS information detailing configuration data has been lost and the clock is not set.
The usual reason for these errors is a flat CMOS battery. In most machines this problem is easily rectified, simply requiring an over-the-counter 3 to 6v battery replacement on the motherboard. However the process is not always quite so hassle-free. Some older PC-type computers used the (in)famous DS1287 Dallas Real Time Clock chip (photo 1) to supply CMOS power. Along with the real time clock this chip also holds the CMOS battery, all entombed together in a compact plugin unit.
Rather neat perhaps, until the battery goes flat in which case the whole chip needs to be replaced! That is assuming you can get the part in the first place. Not easy when dealing with a computer over 20 years old.
My problem
My P/S 2 model 30-286 had a Dallas Real Time chip as described and the battery was as flat as a pancake. Every time I booted up the machine, I was greeted with the errors above. I needed to do something about it!
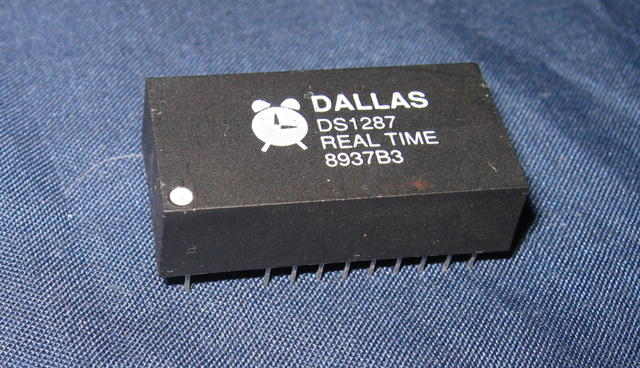
Photo 1 - Dallas Real Time Clock Chip
The solution
As I always do with most of my vintage computer problems, I made a start by searching the Internet. Almost immediately I found an article written by someone who had the same issue and had published a solution. It involved hacking away parts of the chip, then rewiring an external battery onto it. The surgery looked a little tricky but as I had two Dallas Real Time chips from my PS/2 30-286 adventure, I felt it was worth a go.
Following the web article I hacked away the chip material with a small serrated knife. I found the substrate quite soft and easy to cut into. Soon I'd uncovered the two pins I needed to access (photo 2).
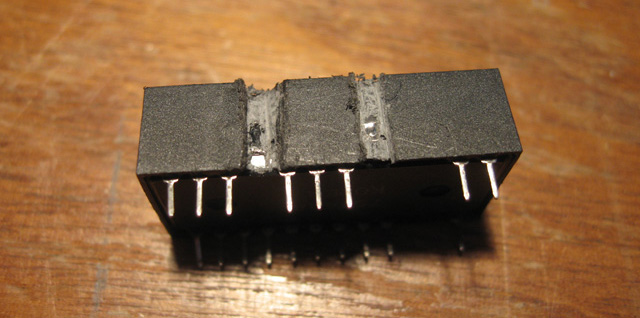
Photo 2 . Exposing the contacts inside the DS1287 chip
After these pins were exposed, breaking the connection to the internal battery was easy. All that remained then was to simply wire up a button battery holder to the exposed metal. My hack job can be seen below. It isn't a soldering job to be proud of and it's not too pretty but the connections are quite secure.
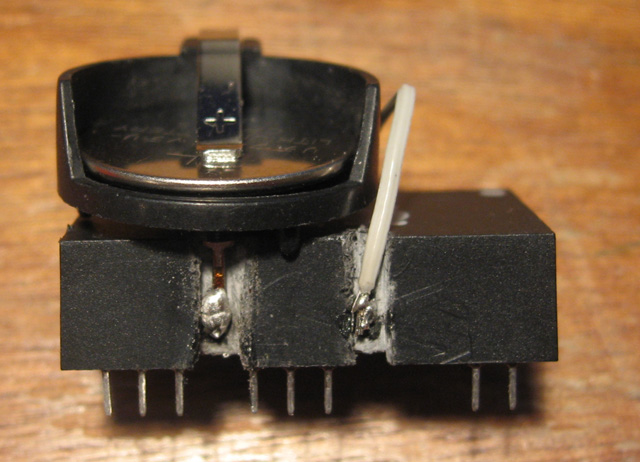
Photo 3. Dallas chip with new external battery
After making sure the solder was firmly connected it was a matter of inserting a 3v lithium button battery into the holder (photo 3), replacing the chip on the board and screwing the PC cover back on.

Photo 4. Refurbished chip on the ps/2 30-286 planar
Booting up with the reference disk, setting the configuration and clock then rebooting showed the fix worked perfectly! No errors, just a straight boot-through as it should be.
All in all, the repair took about a hour and was pretty straightforward. All power to the Internet and particular thanks to Peter. H. Wendt who wrote up the procedure. Brilliant!
Tez
11th October, 2009