Fixing an Atari 400 "garbage screen" issue
 Introduction
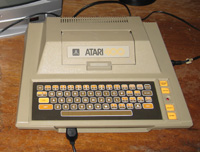
One of the oldest residents in Tezza's rest home for retired computers is the Atari 400. I love this rugged unit which looks less like a computer than a model of some kind of spaceship. It was released soon after the success of Star Wars I guess so it was designed to reflect the "spacey" theme of the day.
I had received this unit from a winning TradeMe bid. The unit had been trawled in as a result of an e-waste collection. It needed cleaning up but I was amazed that it actually went! Sound and graphics all seem to work and the keyboard also, but perhaps not entirely (see below...).
The problem
Now and again I "walk" each of my computers. This involves leaving them running in some kind of loop for a few hours, just to exercise the capacitors. A few months ago, it was the turn of the Atari 400.
All was well for about two hours. However, when I poked my head into the room to check on the unit something had happened! What the??? The screen was showing some bright blue garbage (Figure 1).
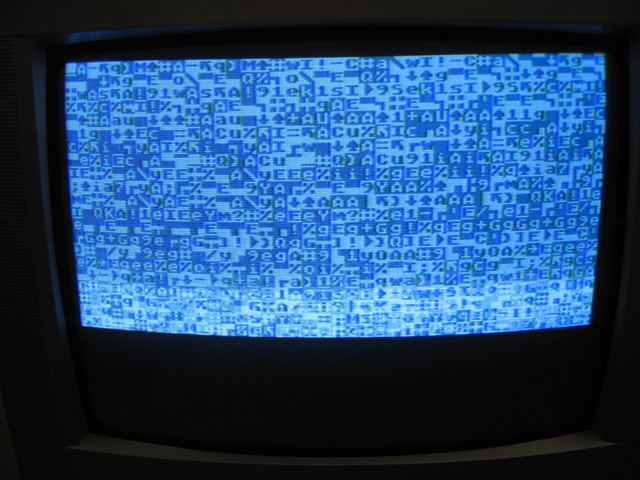
Figure 1. Atari 400 garbage screen
This was not just a static garbage screen of characters, but they were rapidly changing, about one every 0.5 seconds or so. Also, the bottom third of the screen was black! I switched off, left the machine for an interval then switched on again. Same result. The screen showed this symptom regardless of whether a cartridge was inserted or not, although different carts resulted in different colours and letters.
Hmm..another diagnosis and repair project reared its head.
Disassembly
Diagnosis needs information and I found a useful friend in the "Atari 400/800 Field Service Manual". This gave some diagnostic hints and also showed how to take the unit apart.
The Atari 400 has a unique arrangement (Figure 2). The main board lies flat at the bottom of the unit. Plugged into this board are two cards, one containing RAM and another containing three proprietary ICs, the CPU, the ANTIC and the GTIA. The 6502 CPU was kind of familiar but I had not come across the other two chips. However, there was an explanation in the field manual and I also found an article on the web that further explained the function of these chips and others in the Atari. This information proved invaluable.
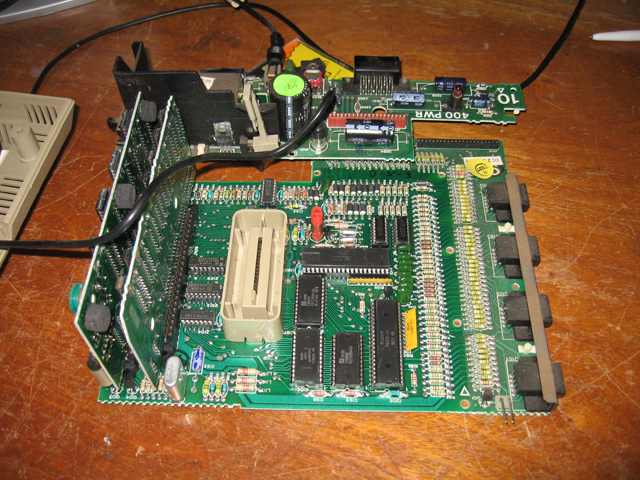
Figure 2. The naked Atari 400
When the computer is assembled, the two vertical boards containing the ICs mentioned above and RAM are sheltered by the rising metal case towards the back of the unit. I'd never seen a design like it. Seeing the complexity of this arrangement I can see why Atari 400 prices stayed so high for so long. It would have been costly to produce the computer!
Disassembly was a bit of a chore. Particularly difficult was the extraction of the keyboard ribbon and the power supply card. The latter needs to be wrenched off its connecting pins. I was grateful for the disassembly guidance in the manual. To my delight I found all ICs were in sockets.
Diagnosis
First thing I did was to check the power values on the board. Were the voltages what they should be? They were all within tolerance.
Next I considered RAM. Sometimes garbage screens in 8-bit computers are caused by RAM issues. There were only 8 socketed 4116 DRAM chips so I figured why not check them. It was easy to do. I swapped them out with a set of known good 4116s. No change.
Next I checked the values coming off the CPU (Note, in the Atari range, this is not a standard 6502. It's customised). These seemed normal. I had a spare 800XL with the same CPU so I swapped it over. No change. I changed the logic chips associated with the data and address bus, and the video. Again, no change.
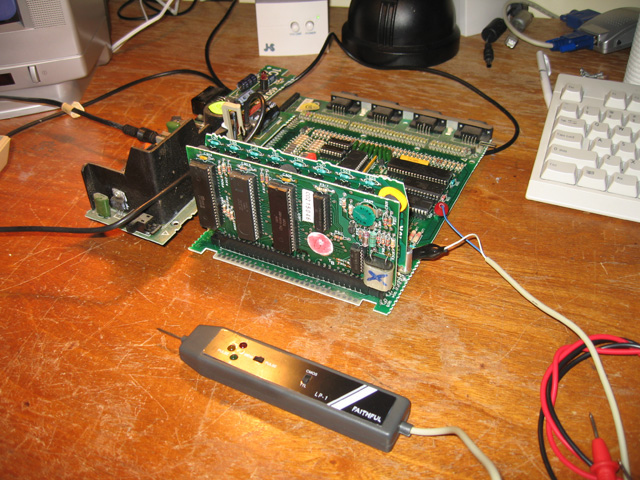
Figure 3. Working on the Atari 400. The GTIA, ANTIC and CPU ICs can be seen on the CPU board, left to right
This is what the web document cited above says about ANTIC...
"ANTIC ("Alpha-Numeric Television Interface Circuit") is a microprocessor dedicated to the television display. It is a true microprocessor; it has an instruction set, a program (called the display list), and data. The display list and the display data are written into RAM by the 6502. ANTIC retrieves this information from RAM using direct memory access (DMA). It processes the higher level instructions in the display list and translates these instructions into a real-time stream of simple instructions to GTIA."
A fault in ANTIC would seem to fit what I was seeing. Other chip problems didn't seem to match the symptoms. The screen characters were well-formed, focused and had good colour so I rejected problems with the GTIA. The CPU was working. RAM was ok (I checked each one). The logic chips supporting RAM and CPU processing were OK (I'd swapped them out). ROM seemed ok in that I could change the screen border colour by typing POKE 712,8 in, even though I couldn't see the characters. Also, the Atari would implement it's "screen saver" (attract mode) colour change routine when left unattended for about 15 mins. More evidence that ROM was ok.
Getting a new ANTIC meant me ordering one from the U.S. The chip itself wasn't much but postage jacks up the cost, so I wanted to make sure it WAS ANTIC before I went ahead. I asked for an opinion in the Vintage Computer Forums and also Atari Age Forums. The helpful people there all backed my hunch. One of them suggested the POKE used above.
The Fix
I ordered a new ANTIC chip, being careful to specify that I wanted a PAL type. It duly arrived. I inserted and switched on. YES! WORKS!! The Atari 400 was back to it's own self. The hunch was right! It HAD been the ANTIC chip.
Another issue found
I reassembled and tested using some game cartridges just to make sure everything was now back to normal. Uh oh...there was an issue. The SELECT and MENU buttons were not working? I checked the other keys. They were ok, it was only these two that did not go.
Hmm..I part-disassmbled the computer again and checked the membrane keyboard. Even squeezing hard on the keys between finger and thumb didn't register anything? The ribbon cable LOOKED ok, but there could be some small cracks in it I can't see (figure 4).

Figure 4. The Atari 400 ribbon keyboard cable
I sought further opinion from the Atari Age Forums. Like me, they felt the fault was either with the cable or membrane keyboard itself rather than any controlling ICs.
The ribbon keyboard is extremely brittle, hard to remove and even harder to reinsert. BASIC worked just fine (it doesn't use the two non-functioning keys) so I decided to leave this fix for another day.
Reflections
I'm glad my deductions were sound and that my replacement chip worked. It was interesting to see the inside of an Atari 400. The horizontal/vertical design of the computer boards was something not often seen in home 8-bits micros. The Apple II has its expansion slots of course but these were for optional extras. The Atari 400 has its CPU on a vertical board!

Figure 5. The Atari 400 working (mostly)
So there is still a fix to do. One of these days I'll get around to addressing the keyboard issue. I suspect this problem might have always been there. I'd never really tested the Atari properly with game cartridges. I'd just used them for screen savers. I had played around in BASIC but BASIC doesn't use those keys. Perhaps they had never worked.
Anyway, at least the 400 is back on it's feet, even it there is still a little to go before it's 100%.
Tez
4th September, 2010
(Update 29th December, 2010: Keyboard now fixed. The cause was a faulty GTIA chip!)