| Tweet |
Making Lisa 2 or Macintosh XL boot, system or installation disks from disk images
Introduction
If you have found this page directly from an Internet search (as opposed to a link from my disk imaging introduction page) you have most likely missed some important information. Please click to READ THIS INTRODUCTORY PAGE FIRST. It explains some generic aspects of disk imaging and why, even if you DO have a good bootable disk, it may not work.
Note the method below is mostly for those whose get their Internet files using a PC. However, the Mac --> Lisa section is valid for everyone.
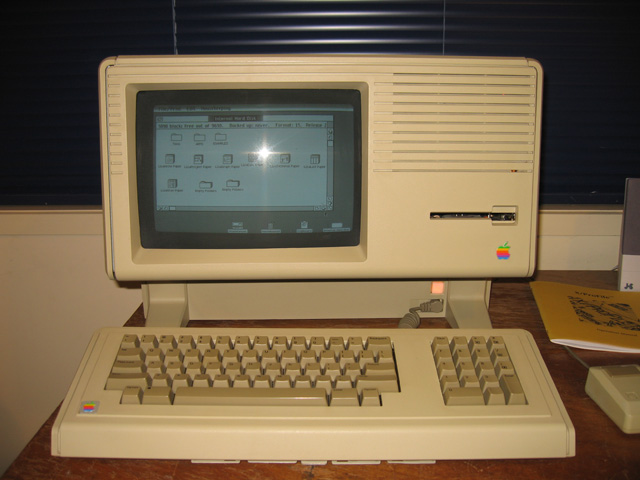
Figure 1. My own classic Lisa 2/10 (Macintosh XL)
Hardware Requirements
- A Windows XP or greater PC with a 1.44 MB drive
- At least one 1.44MB high density 3.5 disk for PC-->Mac transfer
- A stack of good double density 3.5 inch disks
- A vintage mid-late 80s/early 90s macintosh preferably with a hard disk, a high density floppy FDHD "superdrive" (standard on later older Macs) and (perhaps) an 800k 3.5 inch drive.
Unless they have been upgraded, the Lisa 2/5 and Lisa 2/10 (Macintosh XL) load their software using 3.5 inch, 400k single-sided diskettes. You don't need to look for 400k diskettes though. Double-sided double density diskettes (as used on the Amiga, Atari ST or very old Macintosh computers) can be used, written to just one side. Your standard high density 1.44MB diskettes CANNOT be used in the Lisa.
Some disk images to test the method
Software is available on the Web but in order for you to test the method below with KNOWN GOOD software I've uploaded two MacWorks 2.0 disk images. These will work on both a Lisa 2-5 and a Lisa 2-10 (Macintosh XL). You'll need to unplug the widget drive from the latter in order for it to boot off the floppy.
Using these test images will allow you to test the Lisa and the method knowing at least that the originating software is ok. It's a good way to get familiar with the process before downloading other Lisa software.
How to use disks made from these test images on the Lisa
The available image files are the MacWorks Boot (emulator) disk and the MacWorks System 2.0 disk. They are in BinHex format so you'll need to Right click and "Save as..." to download them. These two disks essentially turn the Lisa into an early "floppy only"-based Mac. Once your two floppies are made, this is how to use them:
- Boot the Lisa first using the Boot Disk. This essentially loads in a Macintosh emulator. The screen will go white. After a while there will be a long beep and (if successful) you will see a disk icon with a question mark. It looks like an error but if you see this, the boot disk has actually worked! The Lisa now thinks it's a Mac and is waiting for you to insert the System disk.
- Insert the System disk. The Lisa should now boot to a "Mac-like" interface.
The transfer method
In short, downloaded files need to be written out onto a Mac-formatted 3.5 inch 1.44MB floppy in the PC, then transferred to a real Macintosh. The files may be straight disk images or they may be archives (usually Stuffit ones with a .sit prefix), and so need to be extracted on the Mac before use. Once available the images then need to be loaded into disk imaging software then written out ONE SIDE ONLY onto a double-density disk preferably on an 800k drive.
1. From PC to Mac
My advice would to be to use TransMac for PC<-->Mac transfers. TransMac is shareware and comes with a 30 day trial period.
Format a 1.44MB high density floppy in your Macintosh then put this into the PC drive. Use Transmac to drag and drop files onto the Macintosh formatted disk in that drive. Note that in TransMac the Mac disk is actually represented by a folder under the drive icon on the PC and this is where you need to drag the file. If needed (i.e. if the files are .bin or hqx files) Transmac will decode the files at the same time it copies them. Typically what will be written to the disk are usually either .sit (Stuffit files), .sea (self extracting stuffit files) or .img (straight disk images) files. The test files above should appear as .img files. This disk can then be inserted into the high density drive in the Mac and the files copied onto the Mac's hard drive.
One piece of Mac software you will definitely need is DiskCopy 4.2. If you don't have it (check your Mac) this also needs to be download and moved over to your Mac. You'll notice this is a .sea.bin file. TransMac will decode this file into a .sea file (self extracting file) while you're dragging it onto the Mac disk in the PC. Once the file is copied, put the disk in the Mac drive. You just need to click on the Disk Copy 4.2.sea file. It will install the software on the Macintosh.
If you are wanting to use .sit files you'll need another piece of software, the Unstuffit Expander. Again, check your Mac to see if this isn't already present. This was a common piece of software and you may already have it on the machine. If not download either 4.x (click for a site) or 5.1.2 (right-click to download). Version 5.1.2 needs at least 8MB to install. Move the program to the Mac and install it. You DON'T need this piece of software for the MacWorks test images above, but you will for a lot of other Lisa software.
2. From Mac to Lisa
Now it's a matter of formatting a double density disk (only one side needs to be formatted) and copying the disk image onto it using DiskCopy 4.2.
Here is where it can get tricky. Theoretically, you should be able to use your vintage Mac's high density drive to do this. However, notes on the Internet suggest this doesn't always work (see Addendum JDM 2006-06-10, updated 2006-11-10 at the bottom of the linked doc). Ideally you should make these images on a 800k external drive. I have such a drive. However, I've also tried it with my high density drive in my Classic II and it worked! You may be lucky and not need to find an 800k drive or a very old machine. Mileage is bound to vary. The most important thing is to use double density disks, not high density ones. High density disks will certainly NOT work!
Once your 400k disk is written with an image, you should be able to use it in your Lisa. Just remember, as far as the test MacWorks images are concerned, you'll need both disks. The boot (i.e. emulator) disk needs to be used first. Once you get a screen with the disk icon with the question mark, insert the the system disk to complete the boot sequence (see the section above).
Last words
Information about the Lisa can be found on the Lisa FAQ and "The Mothership" website. The latter site also contains software. Other software (largely unverified) can be had from Raoul's Lisa site.
I've found a lot of the software on these sites just doesn't work for me. Some files may be damaged but I suspect mostly it's a Stuffit issue. Various versions of Stuffit were released and versions were not always compatible with each other. Certain versions of the Stuffit Extractor will only work with .sit files from a compatible version with Stuffit. Otherwise it doesn't recognise the files as valid. You may have to try a few versions of the extractor to get the one that works with the .sit files of interest.
Installation of software on the Lisa hard drive can be complicated so do some background research first. The websites linked above will help. If you are looking to install the Lisa Office suite you may run into this problem. I haven't installed Lisa Office software from the Web but files could need editing to get rid of (i.e. deserialize) an early version of copy protection. I'm not sure. It could be that images on the web are already deserialised. My Lisa Office Suite came with my X/Profile drive so I never had to find out.
Good luck! Hopefully this method will help with getting the old girl up and running.
Tez
2nd January, 2012
| Tweet |