| Tweet |
Repairs to my Apple II Europlus (again!)
Introduction
The stored computers in one's collection are like so many Schrodinger's cats. Unlike the latter they are not boxed up with poison, but you can never know if they are healthy without "opening the box" and checking. Components can age and develop faults simply with the passing of time. I like to test mine regularly to make sure they all still work.
This time my Apple II+ had rolled around in the testing schedule. This machine was working fine when I last boxed it up a few months ago. However, switching on this time revealed a frozen boot screen filled with a few random checkered patterns. Oh well, time for another diagnosis and fix.

Figure 1. Failure to boot. A very familiar image on my Apple II machines
I won't bore you with the graphic details of every measurement, test and result this time. There were many. I'll just summarise the diagnosis. For resources I used Mike Willegal's excellent website, and some linked documents there namely "Understanding Your Apple II" by Jim Sather and a good trouble-shooting guide called "Apple II Service Notes".
It helps to have a working spare
Figure 2 shows my testing setup, with the faulty naked Apple II+ board on the left (displayed on the top monitor) and a working Apple II+ clone board on the right (displayed on the bottom monitor). The working board was handy as I could substitute known good ICs and also compare voltages and signals at various places on the motherboard.

Figure 2. Workbench: Faulty Apple II+ board on the left, a working clone board on the right
Initial suspicions
This Apple II+ was part of a hay barn haul of Apples and had always been a little flaky. During initial investigations for this fault I found that if I flexed the board when power was applied, it occasionally booted. Eventually though even this didn't work. I suspected a dry solder joint or a damaged socket. A careful visual inspection of the board didn't reveal anything obvious though...
A diagnosis (or so I thought)
The video was working just fine and my initial CPU readings showed there was a clock pulse. RESET also worked. Rather than stepping through from the CPU outwards I took the lazy man's way and started the diagnosis by substituting a subset of relevant ICs from the working clone board. This can be hard on sockets but I was feeling lucky. It didn't take me long to find something. When I checked 74LS153 at C1 it looked like this...

Figure 3. IC's never do well with a missing leg
A broken pin! It's possible this snapped off when I pulled the IC but it was also possible it had already fractured. I was sure I'd found the fault. A few of the ICs in this machine are in a poor state with weakened and blackened pins, and the stresses may have got too much for this one. Moreover, a broken pin like this would explain why the machine sometimes booted when the board was bent. In that state, the two parts of the broken leg probably made a connection.
Feeling confident, I added a known "good" replacement IC and turned on the machine. I fully expected it to work.
Except it didn't!
Back to the drawing board
I still had a frozen screen, which now had odd bits of flashing random garbage on it. Very disappointing. Obviously there was more than one thing wrong here...
The nice thing about the Apple II+ board is that all ICs are socketed. I could have continued to swap ICs but I decided I didn't really want to. As mentioned above (and on Mike's website) swapping chips like this can stress sockets, which can develop their own very-hard-to-track-down faults. I decided to diagnose things the proper way, and so prepared the scope and multimeter for readings.
Diagnosis (yes, this time!)
I started to work through the notes in the "Apple II Service Notes" looking for measurements that looked odd. When I tested the earth pin of the F8 ROM at F3 I saw something very odd indeed (Figure 4)...

Figure 4. Strange activity on a ROM ground pin
Whaatt?? The earth pin should have no signal?? Instead it had about 2 volts and waveform?? I checked the earth pins of the other ROMS. They were as expected on 0 volts? Hmm..something wasn't right here. The earth connection in the socket with the ROM removed but the power was on showed 0 volts. Maybe the IC had developed an internal short?
Luckily I had a spare F8 ROM. I substituted that in and, yes, the machine booted to the READY prompt!
Comprehensive checkout
Now that the Apple II+ could boot, I gave the machine a good checkout using some diagnostic software (Figure 5).
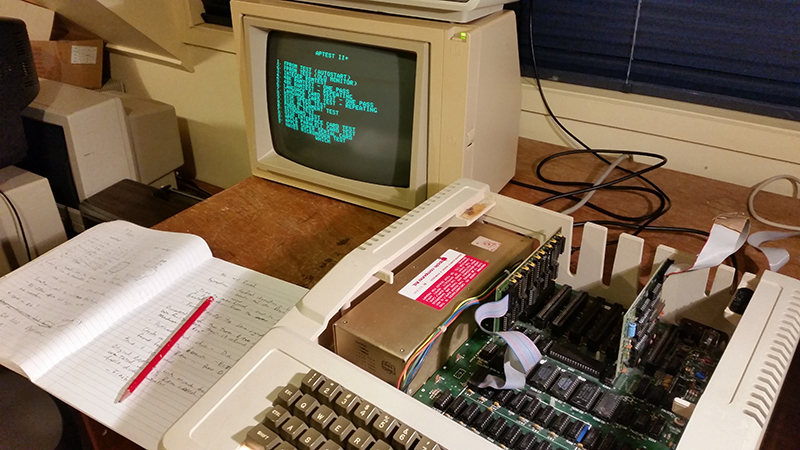
Figure 5. Testing the machine with diagnostic software
This revealed a THIRD fault, a faulty RAM at D2. I replaced that and the machine was at last back to full health.
Concluding thoughts
So in the end there were actually THREE faults. A faulty logic chip at C1, a damaged ROM and a faulty RAM.
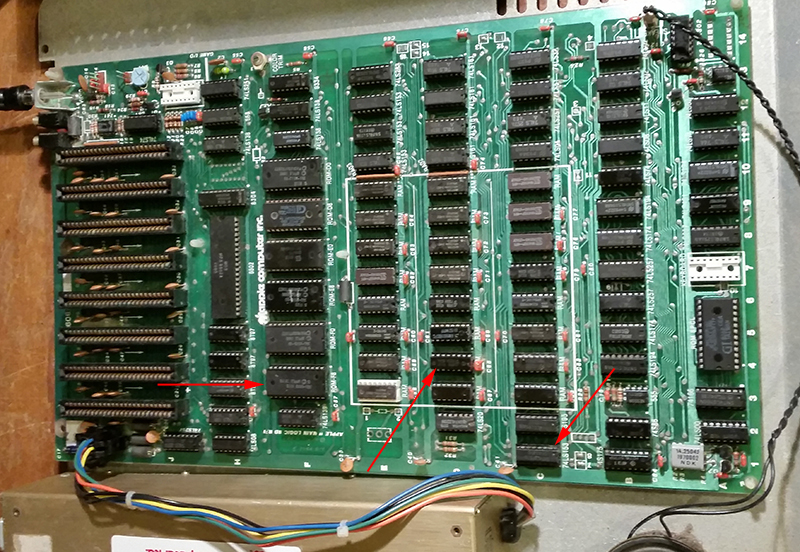
Figure 6. Faulty chips replaced in the Apple II Europlus board
How could the machine develop faults in three chips just from being stored?? It seems a hell of a coincidence. Here's my theory...
Initially, I think there was only one or two things wrong. The faulty RAM could have been there for a while. It could have gone undetected as it didn't stop the machine booting off disk. The non-boot which alerted me to the machine being faulty was initially caused by the broken leg in the 74LS153 at C1. However, in the process of going through many on/off cycles as I swapped chips looking for the fault, I may have stressed the ROM chip to the point where it failed too. Maybe the RAM IC also.
Whether that hypothesis is right or not, for future repairs I'm going to do less chip swapping and more testing. Constantly cycling on and off as each chip is swapped out can't be good for the electronics.
I'm still puzzled about one thing. Assuming there was a short in the F8 ROM which allowed a signal to flow into the ground pin, why didn't that wave signal show up on the other earth pins and in fact all other ground connections given they are connected? Why was it limited to just that one earth pin. I'm sure there is an answer. I just don't have enough depth in electronics knowledge to answer it.
(Update: People more knowledgeable than I have written to me about this hypothesis since I published. It's more likely that is was a socket problem and the ground pin wasn't making contact. Although I did check for connectivity to ground at the top of the pin when the machine was off, doing so meant I applied a bit of pressure to the pin which could have made it form a connection just at that time. It could be that the replacement ROM had a slightly longer leg or maybe bent at a different angle. Makes sense. So, although it's working now, I may have to replace the socket in the future. In fact I tried that old ROM in another board. The chip was ok after all!) .
More to come....
While I had all my test gear out, I decided to attempt to repair a second non-working Apple II+ board I had in storage. I figured it would be good to have a working spare. This is the subject of the next blog post...
Tez
30th November, 2015