Acquiring a Poly 1: A dedicated school computer from New Zealand
Introduction
Every collector has a list of computers they want. On that list are one or two machines that you never expect you'll get. Unless you're lucky that is. I've just had that kind of luck! The computer in question is a New Zealand Poly 1.
The Poly 1 is a computer with a unique place in New Zealand computing history. It was designed by a team at a New Zealand Polytechnic (Wellington Polytechnic) hence the name "Poly". With finances from the New Zealand Government, the designers formed a company to produce an official government-sanctioned school computer. The machine was very high spec. for the day (1980-81). It had colour, graphics, 64k of RAM, and units could be easily networked together, all driven from a central storage unit sporting an 8 inch disk drive and printer port. The all-in-one case was fiberglass which had handles moulded into the sides for easy transporting. It even came in many colours!
Lobbying by business interests killed the initiative before Polys were rolled out to all schools. Nevertheless, some people in New Zealand would have encountered Polys in their school years. A fuller (fascinating) history can be read under the following links:
- The Poly Computer: NZ’s purpose-built school computer
- The Poly Preservation Project
- Poly 1 Educational Computer (Kiwi nuggets forum)
- Wikipedia page on the Poly 1
I was lucky enough to be gifted a couple of these units recently, together with the disk unit, software and manuals. This account, mainly pictorial, gives my first impressions of the machines as I carted them home, cleaned them and switched them on.
Collection and cartage
The original owner lived around five hours or so away from where I lived. These machines were too large to post so a road trip was necessary to collect them. Here they are, straight from the storage locker and ready to start their journey home (Fig 1). Sitting between them is a box of 8 inch disks with the operating system and educational software. Good thing I had a huge boot (or trunk as North Americans would say!).

Figure 1. Picking up two Poly 1s after years of storage
Figure 2 shows the disk unit tucked in the back seat. There is a chip in the fiberglass casing as you can see. The white file box contains manuals and documentation. Some of you might recognise the little computer on top as an Acorn Electron with the Plus 1 expander.
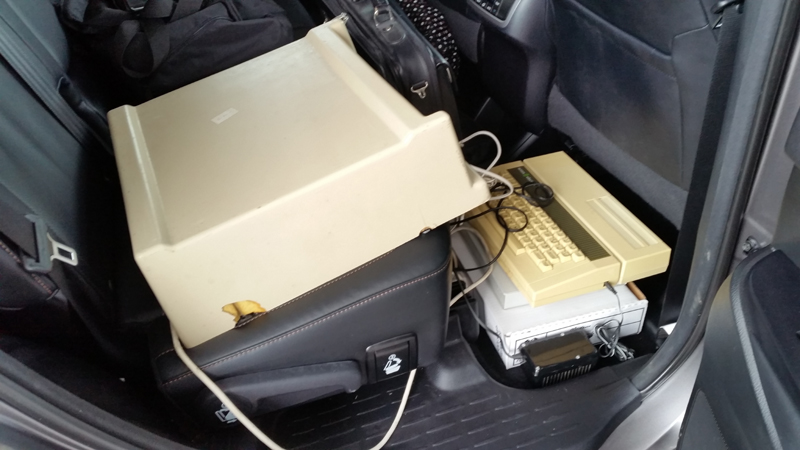
Figure 2. The Poly drive
Cleanup and physical examination
Once home, the Polys needed a good clean so I set to work. Here is one nicely buffed up. Notice that it only just fits on my desk (Fig 3). These behemoths are humongous!!
The number of keys are impressive. As well as the normal full stroke QWERTY there is a numeric keypad and arrow keys for editing (and game playing?). Apparently games did exist. It wasn't all just maths drill for the students. :-)

Figure 3. One of the Poly 1's cleaned up!
Figure 4 shows a rear view. The carry handles give the machines a unique shape...the design is very retro-futuristic. I love it! Around the back there is just one port. It's designed for another Poly to daisychain into. The black cord with the silver connector is designed to mate with another Poly or the disk unit.
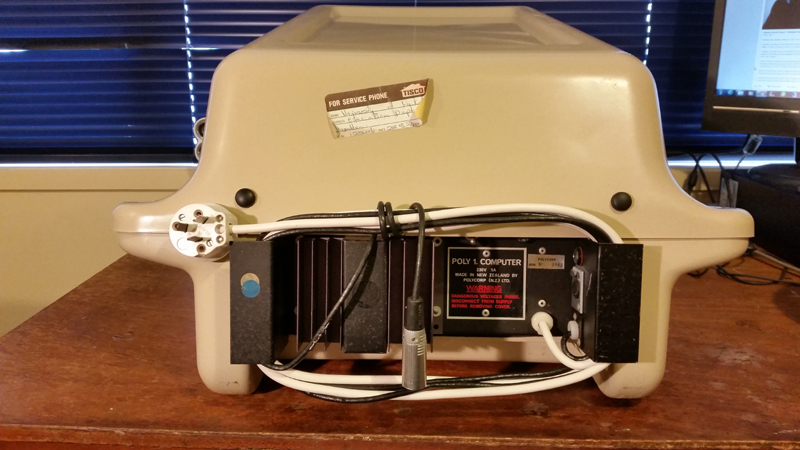
Figure 4. Poly 1 from the rear
Figure 6 shows a close up of the badge and serial number on one of the units. Polycorp (N.Z.) Ltd was the name of the spinoff company that produced the machine.
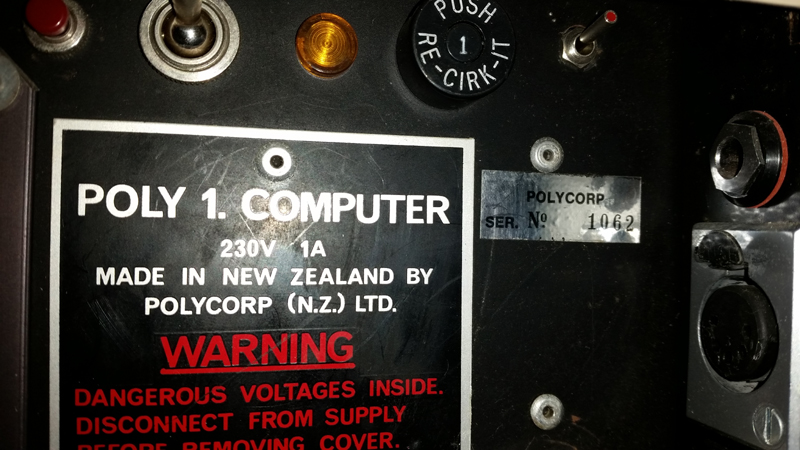
Figure 5. Serial number and badge
At one stage during cleaning, I flipped the Polys on their side to clean the bottom. Figure 6 shows what's underneath. Note the two screws under the keyboard. Undo these and a couple of others in the rear recess and you can lift the top right off!..
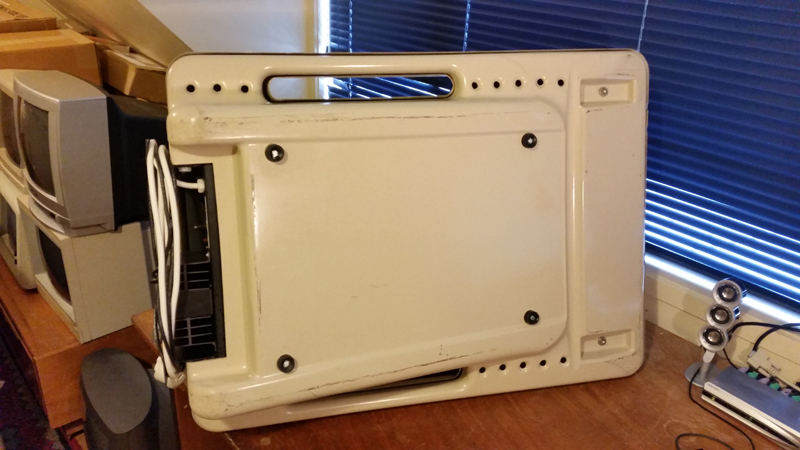
Figure 6. Here's what it looks like from the bottom
..and if you do lift the top right off, here is what you see (Fig 7).
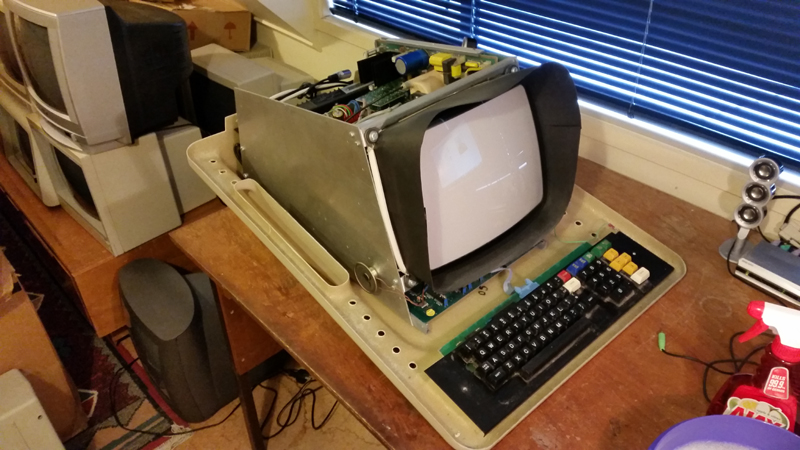
Figure 7. Poly 1 with the hood off
There is a lot of circuitry in there (Fig 8)! The large main board is at the bottom. Just how easy that board is to remove I'm not sure, but I'll no doubt find out one day!
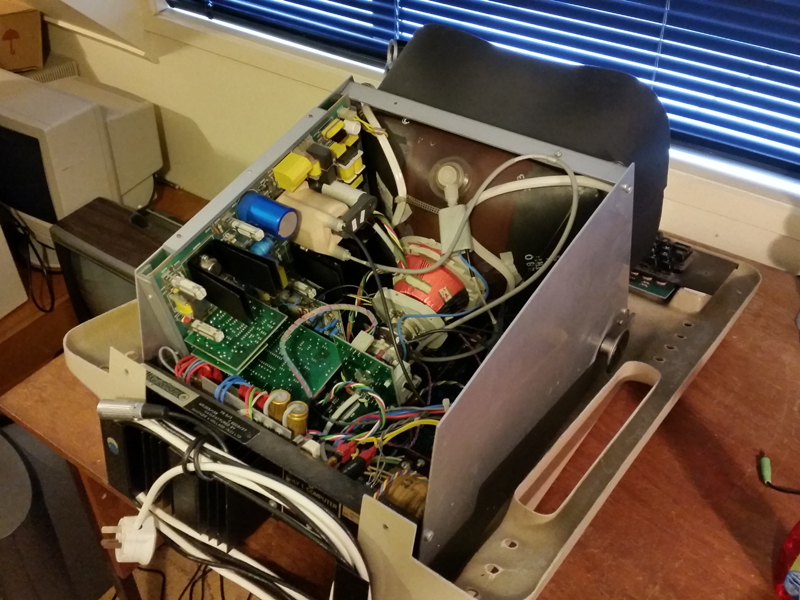
Figure 8. A naked Poly 1
Now on to the disk unit (Fig 9). You can clearly see the size of it. Its footprint is not quite as large as the computer itself, but it's not too far off either. It's huge! It holds one 8 inch floppy disk.

Figure 9. The Poly Disk Unit (designed to be connected to one or more Polys in a daisychain arrangement)
Around the back (Fig. 10) there is a socket for the last Poly on the daisychain, a vertical parallel port connector and a connector for another disk drive on the upper right.
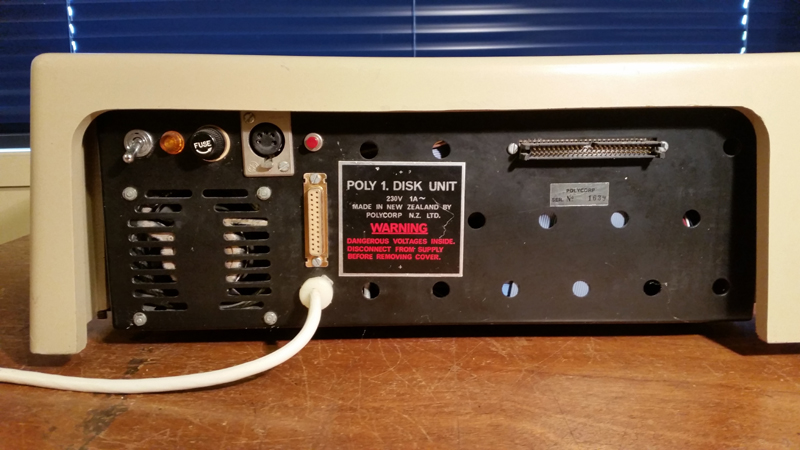
Figure 10. Rear of the Poly 1 disk unit
Here it is the disk unit with the top off, and with a disk inserted. The top of the disk can be seen on the lower right. It's a huge piece of equipment but I guess it does more than just spin the disk. To service all those connected Polys plus provide a printer port, the hardware would have to be just a tad "intelligent".

Figure 11. Inside the Poly 1 disk unit
Testing: Flipping the on/off switch
Ok, the cleaning and physical checking was done, but would these Polys still work? My expectations were not high. Consequently I was delighted when at least one of them did! Up came the greeting screen themed with a restful lavender background (Fig 12). Excellent!
The second unit didn't perform quite as well. Occasionally the boot screen would appear but it was accompanied by an alarming squealing/fizzing of capacitors and general instability. I may try and fix it, or just keep it as my parts machine.
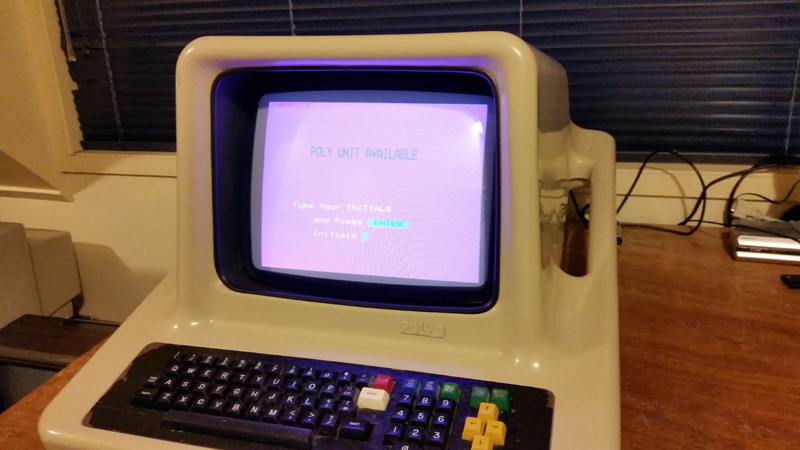
Figure 12. A Poly 1 alive!
Figure 13 shows the second (flaky!) Poly. Still a clean looking unit though.
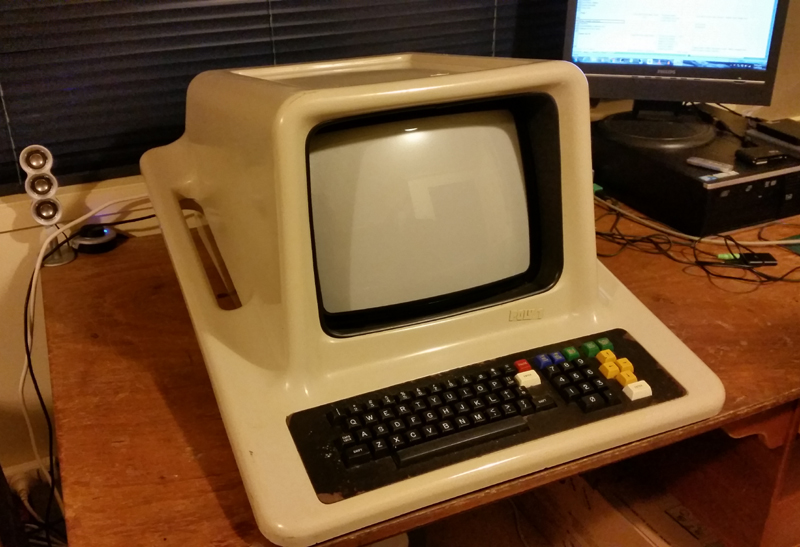
Figure 13. The second Poly 1 (it has issues!)
As I mentioned the Polys came with software and manuals. Here are just a few of the latter (Fig 14). Bedtime reading material!
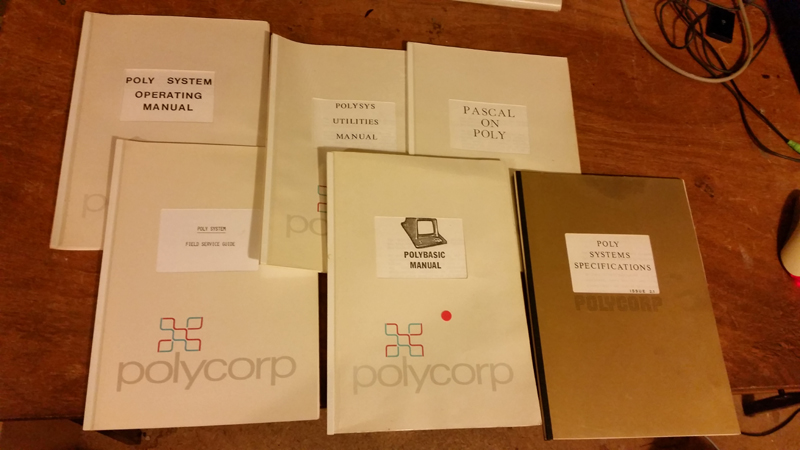
Figure 14. Just some of the literature that accompanied the Polys
Summary
I'm thrilled to have these machines. I'm impressed by the cool design and solid nature of the beasts. They seem well-put together. Letters are clear on the screen and the keyboard is nice to use.
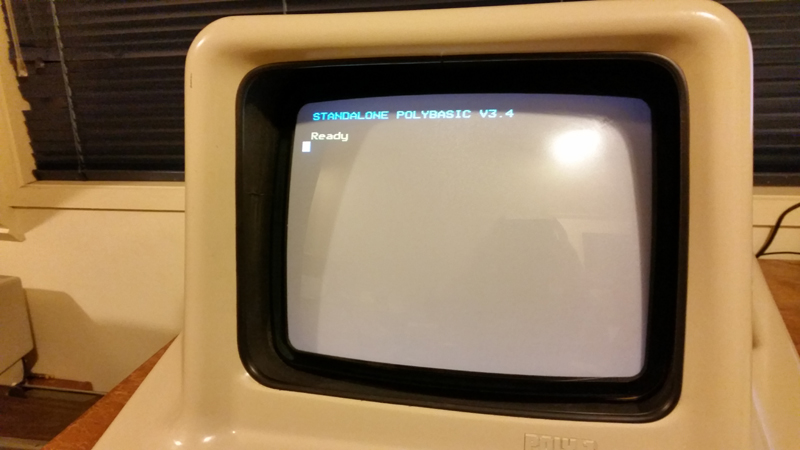
Figure 15. Any one for PolyBASIC?
Future work
There is still a lot more playing to be done with these Polys. Testing so far has been limited to just the stand-alone computers...and only to the extent of checking they booted and the keyboards responded to key presses. When I have time, I'll see if the drive works and if I can read/write software from the disks. I'd also like to see if I can fix the second erratic unit. Hopefully it's just a capacitor or two. It would be so cool to have them both daisychained and working as they would have in a school environment.
Lots to enjoy! (:
Tez
8th October, 2016