Kaypro II boot failure fix. A lesson in making assumptions
 Introduction
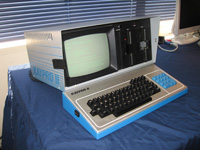
My Kaypro II ranks up there amongst the best of my collection. It's clean, colourful and in near-mint condition. Its proud vertical drives are a badge of its rarity, being one of the very early models. I love and treasure it. Imagine my dismay then when for some inexplicable reason the computer just failed to boot? The drive kept spinning and that old insert diskette message just remained stubbornly on the screen (figure 1).
This unit had seen a few failures since residing with me, failures which belie its immaculate appearance. On delivery, the drives had alignment issues, capacitors have exploded while recently a serial chip had failed resulting in a non-responsive keyboard. These had all been dealt to so it was with some dismay that I noted this new issue.
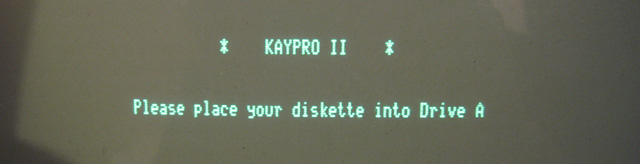
Figure 1. Screen message which just wouldn't go away
An initial diagnosis. RAM?
 Figure 2. MOSTEK RAM showing signs of deterioration
One of the wonderful things about a Kaypro II is that every IC is socketed. This means the amateur such as myself can take the easy way out and simply swap out suspect ICs, without really tracking down the cause from first principles. Initially I suspected RAM, not from any informed deduction based on observation, but rather because the existing MOSTEK DRAM ICs were showing physical signs of deterioration (figure 2 opposite). The pins were black and weak. I decided as a first step, these ICs should be replaced.
In the spares box I had a PC/XT board populated with RAM (figure 3). I'd loaned some of the 4164 ICs on this board to friend Philip Avery to replace his own deteriorating RAM. I decided to transfer some more from this repository to my own Kaypro II board, replacing the old MOSTEK RAM within.
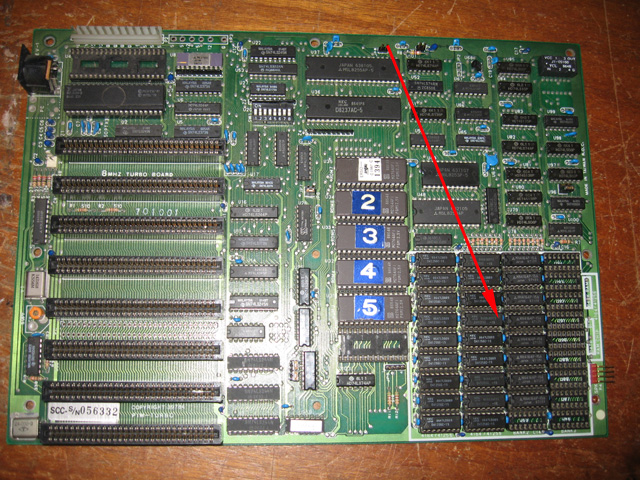
Figure 3. RAM bank on an unused PC/XT. A ready source of ICs!
On switching on I was presented with a different kind of screen, one even more disturbing than the original problem. A screen full of garbage characters! Hmm...this raised new questions. Maybe one of those replacement 4164s was faulty? Or maybe a socket was faulty. I removed the RAM chips one at a time and checked the sockets. Ah ha. On the top most socket at pin location 10 there appeared to be a damaged lug (figure 4). It was flat against the side of the plastic and you could actually see the circuit board from the top. There was a good chance contact with the RAM pin could be lost when RAM was inserted.

Figure 4. Faulty pin 10 holder in this socket
I reinserted the RAM IC and wriggled it a little so it wasn't quite seated down as far as it could go. Maybe in this position contact would be made. I then switched on. Hmm..back to square one. A clear insert disk message but a spinning disk drive which failed to boot a good boot disk. I wriggled the RAM around a bit more. Sometimes I did get a garbage screen...sometimes I did not.
My assumption? That the absence of a garbage screen meant the faulty RAM socket WAS making the connection. This assumption may indeed be correct at this particular time but as events soon showed, it was a dangerous one. In fact it came back to bite me.
Not RAM. The data separator chip maybe?
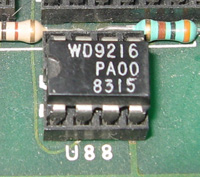 Figure 5. The data separator IC
So, swapping out the RAM had not solved the problem. It must be something else. Suspicion fell of the data separator IC (9216), as my symptoms seemed similar to the problem Philip Avery had encountered when restoring his own Kaypro II. In that instance a 9216 IC was found to be at fault.
After a hunt through some of my disk-based 8-bit machines failed to reveal a 9216 IC for swapping out purposes, I decided to wait for an opportunity for Philip to bring his Kaypro II over. We could then compare readings and swap out suspect ICs.
An all-day diagnostic session
A few weeks later Philip and his Kaypro II paid a visit. The first thing we did was take some measurements. Power seemed ok. My 5v line was a little low (4.85v) but was considered within tolerance. I swapped Philip's board with mine. The problem followed my board, so that eliminated the drives as a source of the fault.
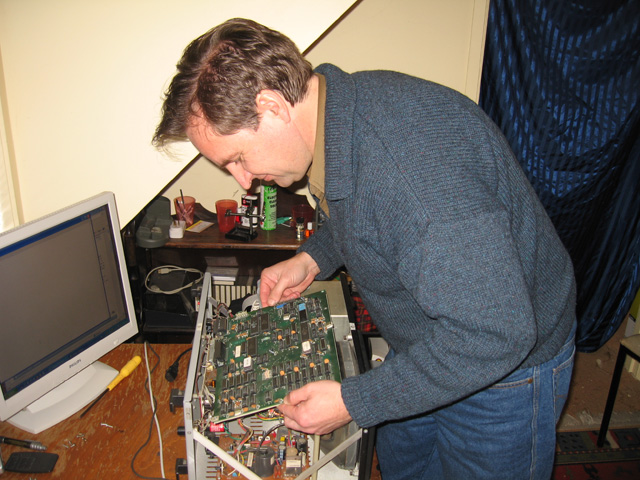
Figure 6. Philip removes his Kaypro II board for a board swap
Here's what seemed to be happening...
- The drive was not selecting track 0, although the stepper moved.
- Sometimes the insert disk message was garbled or incomplete.
- Pressing reset turned both drives on. Often this would also result in random pieces of garbage on the screen?
CPU readings appeared normal. Or at least as far as we could ascertain. Philip is more skilled at reading circuit diagrams than me and with his guidance we followed the lines from the drives back through their path to the CPU. We swapped out all appropriate ICs in the pathway. No change. I checked the faulty socket to check if pin 10 was making connection with the line. It was.
This was a real mystery?? Suspicion fell on RAM again, so we swapped out all my RAM for Philips known good-RAM. No change. However, this time I didn't check if the suspect socket was still making a pin 10 connection. I should have! (read on...)
I re-inserted my RAM. By that time is was late afternoon and time for Philip to leave. We'd had a good day talking about vintage computers but hadn't made much progress on what was turning out to be a very puzzling fault?
A "shotgun" swapout
Philip left his Kaypro II with me so I could continue working on the problem. I thought I'd take the shotgun approach and just swap out ALL the ICs. Sometimes a faulty IC can have downstream effects and may effect other parts of the circuitry, like positioning the disk head. Of course swapping ICs took an age.
No result. I even swapped those we'd already tried.
RAM revisited
I sat and thought a while. I figured that maybe I should check that socket again with a multimeter. We had checked it before, but I felt it worth another go. This time pin 10 showed no connection!! Oh great! *sigh* I'd been swapping all these chips out, with a faulty RAM connection. Even if I'd hit on the fault, it might not have shown up.
I considered replacing the socket, but it looked difficult. I decided instead to solder a wire from the RAM IC pin to a spot on the board which carried the same data.
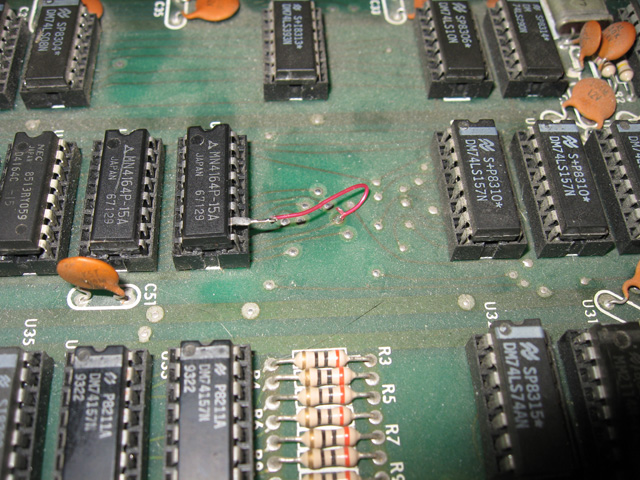
Figure 7. Bad socket jumper fix
I booted! No apparent change....or was there? Actually yes there was. I now could see a few characters in the left hand top which looks like they might correspond to the boot up CP/M message. They were garbled though and the drive kept spinning.
I wondered if perhaps it was RAM after all, and that pin 10 of the top IC wasn't making contact when we tried Philip's RAM. After all, we hadn't checked the connection. I started to methodically substitute RAM ICs from Philip's board. After a few substitutions suddenly the drive stopped on boot. Letters were still garbled but it looked like there might be a cursor there. I added the keyboard and found I could get a directory, even though all the letters were substituted (figure 8).
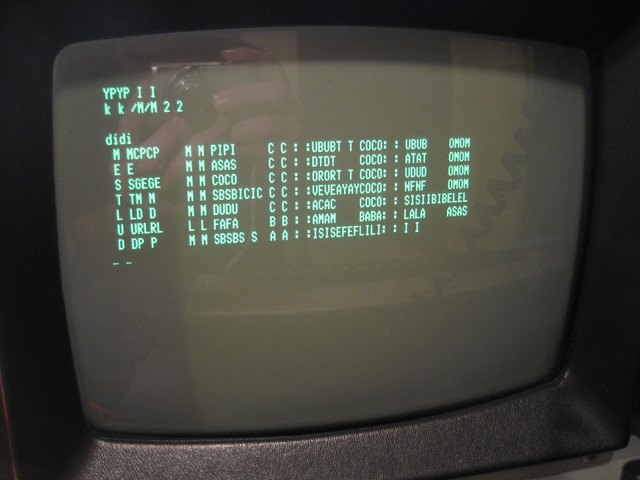
Figure 8. Kaypro II garbage directory
I substituted a couple more RAM chips. Suddenly I had the CP/M prompt!! Success!!
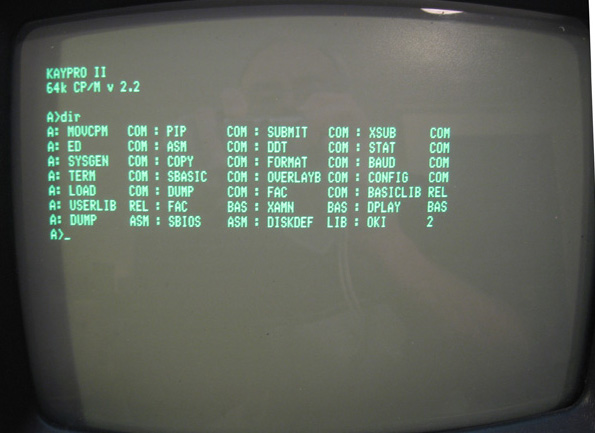
Figure 9. A successful boot. But was it the end of the story?
Seems it was bad RAM after all.
Bad RAM. Or was it?
I was really puzzled though. How could so much RAM be faulty? By this time the Kaypro RAM bank had the top socket occupied by my RAM (with the jumpered pin), the next 4 sockets occupied by Philip's known-good RAM and the 3 bottom sockets occupied by my RAM. I substituted my RAM back in, in a single position in the RAM row (socket 4), switching on each time to test. When this happened sometimes I got the "wrong characters" boot and sometimes I got no boot..just like the original symptom. How could it be that all my RAM was faulty??
I decided, just as a test, to put one of the three chips I had remaining in the bank (the one in socket 3), into the socket I'd been swapping the chips in and out of (socket 4). The "good" RAM (Philip's) that was in socket 4 I put into socket 3. Doing this gave me a non-boot with garbled characters. Huh? How can this be? I'd simply switched positions in the bank? Could it be that socket 4 was also bad?
The answer (Duh!)
It was at this stage I noticed something. I was making sure Philip's RAM chips weren't getting mixed up with mine so I was reading the labels. I noticed a couple of my remaining RAM chips were 41256s?
WHAT???
41256??? I thought I had 4164s in there? I checked all the ones I'd removed i.e. those I had tested in that socket and had failed. ALL were 41256s??? I grabbed that PC/XT board I'd got the chips off. The ones that remained on there were all 41256s!!
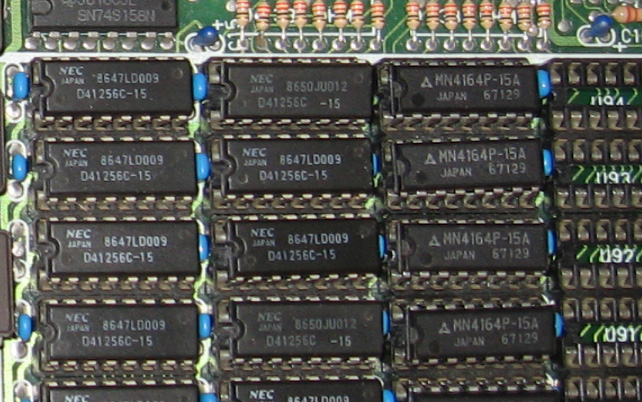
Figure 10. RAM in the PC/XT RAM bank before I removed the 4164s I loaned to Philip.. A combination of 41256 and 4164 RAM side by side!
So...it seems that board had had a COMBINATION of 41256s and 4164s!!. The latter were in the higher banks on this PC/XT board and the former in the lower ones. In that original MOSTEK RAM swap mentioned above I had grabbed those in the lower bank (the left bank in figure 10) assuming they were all 4164s. In fact they were 41256s!
ARRGGG!!!!!
I set about replacing all the RAM with genuine 4164 RAM. Half of these were the old MOSTEK ones (fished from my "to bin" bag) and 1/2 were spares I had lying around. I also replaced and resoldered the pin of the highest RAM chip (this had been a 41256...now it was a correct 4164) to the board again to ensure a good connection.
SUCCESS! The machine appeared stable and always booted to the CP/M prompt. I replaced boards and my own drives and everything seemed to work AOK.
By then it was 12.45am! I made a mental note to order some more 4164s. Then I went to bed!
Reflections
There are a few things here to reflect on. First, the cause of the problem:
- I had a MOSTEK RAM chip which went bad at the top of the RAM bank OR perhaps it was just a bad connection on that pin (pin 10). This caused the initial problem
- In replacing the MOSTEK RAM I noticed the bad socket, but considered it a minor problem. I felt when not connected I would get a characteristic garbage screen (not necessarily so!). I was sure it was the data separator at fault. I could leave the socket fix until later. (Mistake 1)
- I replaced the RAM with a combination of 41256 and 4164 chips thinking they were all 4164s. (Mistake 2)
So, the wrong RAM was installed and sometimes the bad socket was not making the connection. This made the machine behave very strangely. We did swap out all my RAM for Philip's at one stage. I assume when this was done, that faulty socket didn't connect though, which is why it didn't seem to make a difference to the symptom. A non-connection wasn't ALWAYS a garbage screen like I had assumed.
Lessons learned.
- Always check the labels on ICS. Just because they come from the same area on a spare board don't assume they are the same.
- Don't trust that a "wriggle" will fix a faulty connection, even temporarily. Fix it, even if it seems unconnected to the fault.
Incidentally according to the web 4164 and 41256 ICs are interchangeable PROVIDED pin one is grounded. No doubt this is why they could co-exist in the PC bank. In the Kaypro though, pin 1 is not grounded. It's just not connected.
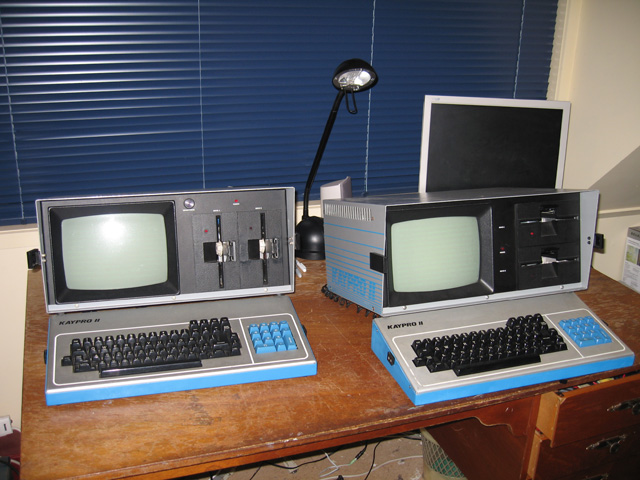
Figure xx. Kaypro IIs alive!
So, a self-inflicted fault which ate up most of my weekend. At least I've got a working Kaypro II back!
Tez
6th September, 2010