EPROMS: The minimum you need to know to burn your own
Introduction
From time to time those of us with the passion to preserve ancient computers from the 1970 and 1980s will come across the need to replace a failed masked ROM or EPROM. This article is for those that are unfamiliar with EPROMS and want to get their machines up and running again. The text below covers only EPROMs rather than the later programmable ICs such as EEPROM, MPU, GAL/PLD etc. mostly because I don't know much about them. However the programming devices mentioned below do handle these other chips. Furthermore, the article doesn't cover all of the theory and physics. Rather it provides enough practical tips and information for readers to attempt an EPROM replacement of failed compatible parts.
What are EPROMS
EPROM stands for Erasable-Programmable ROM. The ICs hold code, often an auxiliary program such as an application, utility or game which can be loaded immediately on startup. Sometimes they were used to house the bootstrap code and/or the BASIC interpreter in old microcomputers although this function was often more commonly provided by mask ROMS. Mask ROMS have embedded code that can't be changed. EPROMS also hold code but can be erased and reprogrammed. Once reprogrammed (or "burned"), they can hold their data for many years.
EPROMS then, are ideal for replacing mask ROMs that have gone bad along with adding extra applications and utilities, and for general tinkering.
What does an EPROM look like?
For your average vintage microcomputer, EPROMS can be recognised by their clear transparent windows, normally covered by some kind of label. Usually these ICs start with either a 27- or a 25- prefix but there may be others. After the prefix is a number such as 16, or 32, 64, 128 etc. This refers to how much data the EPROM can hold in kiloBITS. There are 8 kilobits in a kilobyte. A 2716 EPROM then can hold 2 kilobytes (k) of code. A 2732 can hold 4k and so on. Some EPROMS are low-power CMOS ICs. These have a "C" between the prefix and size number e.g. 27C32. CMOS EPROMS can be used in place of standard EPROMS in most cases.
Erasing an EPROM
Before EPROMS can be filled with code, they must be blank. To blank an EPROM they need to be subjected to strong UV light, typically in an EPROM eraser. This is why the ICs have a clear window in them; to allow the UV light to penetrate and erase the data. Fig 1 shows my eraser. These are inexpensive devices that can be found on eBay.
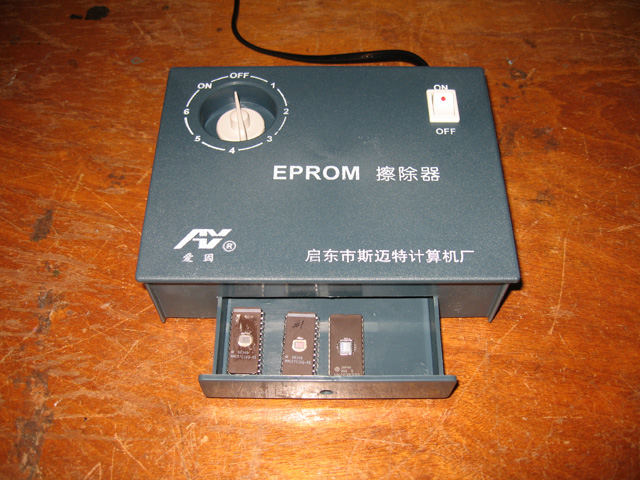
Figure 1. An inexpensive UV EPROM eraser
Just how long it takes to erase an EPROM will depend on the light intensity and the EPROM itself. Typically, my eraser will blank a chip in about 20 minutes. Be careful as EPROMS can be damaged from too much exposure. Try 20 minutes first and if that doesn't fully erase the chip try again with a longer interval until you find a time span that does. Most EPROM programmers allow you to check if an EPROM is blank (see below).
One last thing. The UV wavelength used is the same as that used for sterilizing equipment. It is not the harmless UV found in disco lights. Don't look directly at the bulb when the door is open.
Programming (burning) an EPROM
(1) Some basics
Here are some things you should know about EPROMS when starting out...
(a) Programming voltages can differ
There are two important voltages applied to EPROMS. One is the READ voltage. This is applied to the Vcc pin and is typically 5 volts. It is used to read the data in the EPROM. The other voltage is the programming voltage (Vpp). This is used to burn data in the EPROM and can vary depending on chip type and manufacturer. Typical values are 25v, 21v or 12.5v.
Here is an important piece of advice. KNOW THE CORRECT Vpp OF THE EPROM YOU WANT TO BURN. The incorrect voltage can kill it. Chances are your EPROM programmer will require you to select this value. Search Google and get a datasheet for your EXACT EPROM. Not just the size but also the manufacturer. Different manufacturers used different Vpps for their EPROMS. For example, one manufacturer might use 21vpp for their 2716 ICs whereas another may use 25vpp. Make sure you know the specs you're dealing with.
(b) Not all 2716s are created equal
Here is another quirk of early EPROM nomenclature which is important to know. There are fundamental differences between the ("non-standard") TMS 2716 made by Texas Instruments and ('standard") 2716s made by others. These are explained in this Google Groups posting, which also elaborates on the 2516 and 2532 series and how they differ from (or, in the case of the 2516, are the same as) 27xx EPROMS of the same size. Unlike their 2716 chips, Texas Instruments (TMS) 2732 EPROMS (which do exist) are similar to those produced by others.
(c) The useful Motorola 68764/68766
Another 'non-standard' EPROM worth mentioning is the Motorola 68764/68766, which is a 24-pin direct replacement for many 8kB ROMs as used in old IBM PCs, Commodore, etc. This is in contrast to the JEDEC 'standard' 2764 8kB EPROM which is a 28-pin chip with pinout and programming similar to the larger 27128 to 27512 versions; 28 to 24 pin adapters are available if you can't find the 24 pin Motorola EPROMS or your programmer doesn't handle them.
(d) Beware of OTP (One time programmable) EPROMS when ordering
Some EPROMS don't have a window and are not erasable even though they have the same part number as the erasable version. These are OTP or "one time programmable" EPROMS. Be sure to check when ordering and make sure you get the UV-erasable version (unless you want an OTP of course).
(2) Choosing a programmer (Note: this is what I used in 2012, when this article was written. I'm sure there are better solutions out there nowadays!)
First rule is to know the kind of EPROMS you want (or are likely to want) to burn and get a programmer that can handle them. There are a number of programmers on the market. Beware though, as many modern ones will not handle the smaller capacity ICs like the 2716 and 2732 ones found in very old microcomputers.
Willem programmers appear popular (fig 2). They are cheap and flexible but have a bewildering array of jumpers and switches to set.
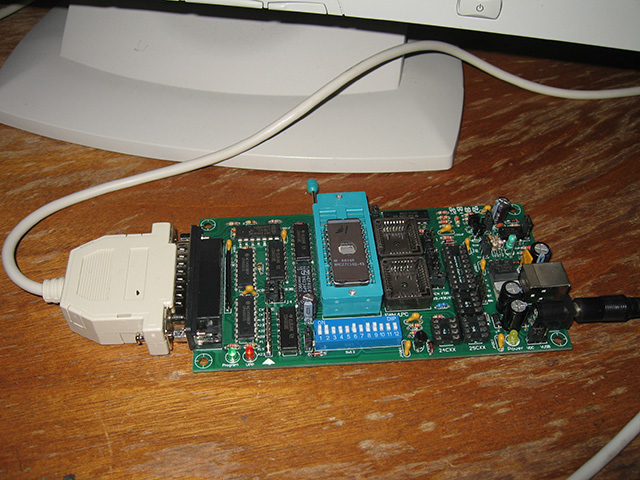
Figure 2. A Willem programmer
I had a Willem but it died so my current programmer is a Top 853 out of China (fig 3). It's also inexpensive, is completely software driven and can supply all necessary programming voltages from a USB link. It seems to work well, although at the time of writing the manual for this Chinese device appears to have been written using an early version of Google Translator! It's almost completely unreadable. If you know the basics though the software is easy enough to follow.
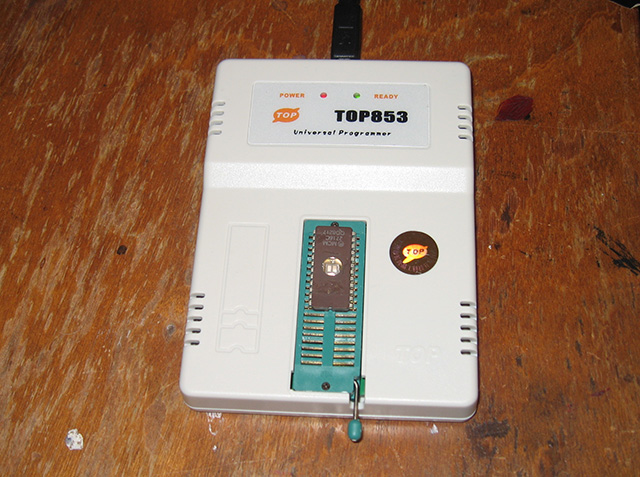
Figure 3. My TOP853
(3) Burning the EPROM
The programmer needs to be configured for whatever type of EPROM you are using. The Willem requires you to set jumpers and dip switches whereas my TOP 853 allows chip selection from software. In particular make sure the Vpp is correct and that the IC is oriented correctly and in the right position on the IC holder.
The software that comes with the programmer will manage the burning process. Modern programmers use menu-based interfaces that are easy to use. With the chip in place, the first step is to load the code into a buffer prior to burning it into the EPROM. Code for ROMS and EPROMS can be found on the Internet for all kinds of vintage computer models. The code needs to be a binary file. Figure 4 shows a screen shot of my programmer with a 4k System 80 ROM image loaded.
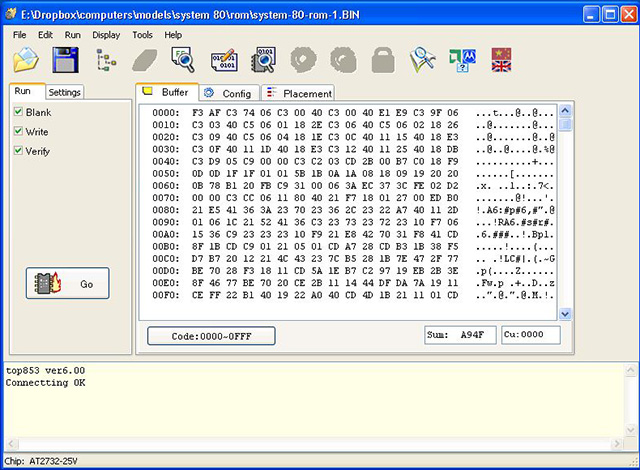
Figure 4. TOPS 853 software showing a binary loaded into the buffer and ready to go!
Once the code is loaded into the buffer, the EPROM is ready for programming/burning. There will be an icon or menu selection for this. Usually a status bar shows progress. Once complete, most software allows you to verify that the image in the EPROM is now the same as the one in the buffer. It may even check automatically. If things are OK, you're done.
If your EPROM doesn't burn successfully it could be that:
- It wasn't blank (some programmer software allows you to check the EPROM to see if it's blank before burning)
- It is damaged and/or unusable
- The binary image is too big for the EPROM
- The programming "delay" is incorrect. There will be a setting for this somewhere in the software. It normally defaults to some value when the IC is selected. Try smaller or larger values and see if this fixes the problem. I found I had to change the delay value from default 5ms to 1ms before I had success burning my 2716 and 2732 EPROMS with my Top 853. Bear in mind an unsuccessful burn will probably require the EPROM to be blanked again.
(4) Place a sticker over the clear window on the EPROM
An opaque sticker is needed over the glass window to stop any stray UV light getting into the chip and messing with the new data. It's a good idea to label this sticker with the contents of the EPROM.
Using an EPROM to replace a mask ROM (take care!)
If you use an EPROM to replace mask ROM, it is usually not as straightforward as plugging the EPROM in the masked ROM socked. Often the pin-outs of the mask ROM will be different to the EPROM and some kind of "adapter" needs to be made to switch the pins around or the board circuitry altered. Here is one of my efforts regarding the latter. What you need to do will differ depending the machine. You'll need to find the schematics to check and/or engage with the community of enthusiasts in whatever forum that supports the machine to find out.
Reading mask ROMS (take care!)
You might want to use your EPROM programmer to read a mask ROM to see if it's damaged. As mentioned above, unless the mask ROM is pin compatible with an EPROM that the programmer supports you'll need to make an adapter first to switch the mask ROMs pins to those matching the supported EPROM. Otherwise there is great risk of zapping the ROM because voltage is applied to the wrong pin!
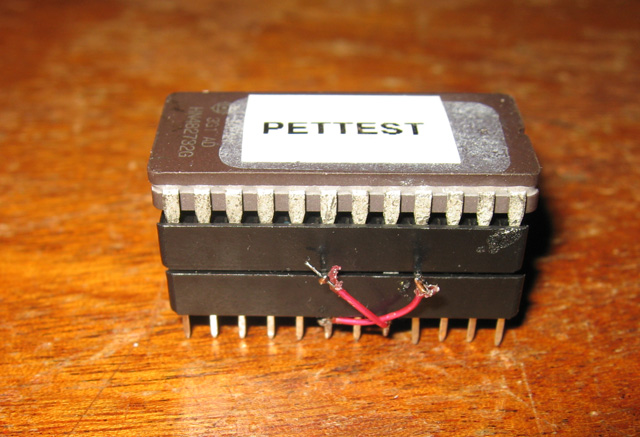
This adapter technique can be also used to read or program EPROMS that are not supported by your programmer as I did with these 2532 EPROMS for my Pet 3032.
Last word
Getting to grips with EPROM programming, and having the gear to do it, is worthwhile if you want to maintain a vintage computer collection. As well as being able to replace faulty masked ROMS and EPROMS, you can also READ the ROM contents of rare machines. Not all ROM images are available on the Web and it's a good idea to extract the code for posterity (and possible future use!).
This article is just a basic primer. There is a lot more to know about EPROM technology so Google about for the specific information you might need. Have fun!
Acknowledgments
A couple of VCF folks helped me refine this article. Thanks to Chuck(G) for alerting me to the differences between TMS2716 EPROMS and regular ones, MikeS for the notes on Motorola 68764/68766 and OTPs and RJBJR for suggesting I add in information about UV exposure times.
Tez
24th October, 2012