Replacing leaky capacitors in a Macintosh SE/30: this time with modern SMD ones
Introduction
The classic Macintosh SE/30. Fastest and best-loved of the baby-macs from the 1980s.
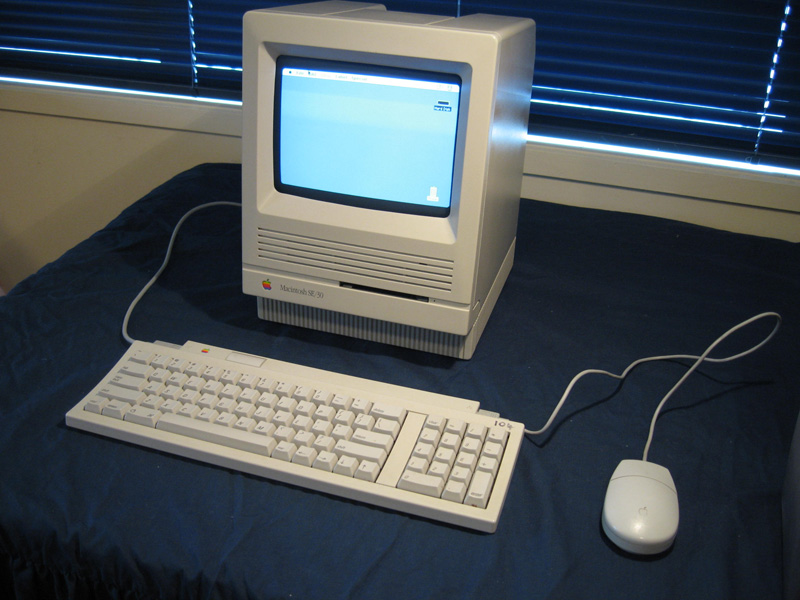
Figure 1. A Macintosh SE/30 running happily
It had to happen. I knew one day I would fire up my classic Macintosh SE/30 only to be presented with what you can see in Figure 2! Actually this is not my photo (it's from here), but the symptoms were exactly the same. No happy face, no "bong", no nothing.
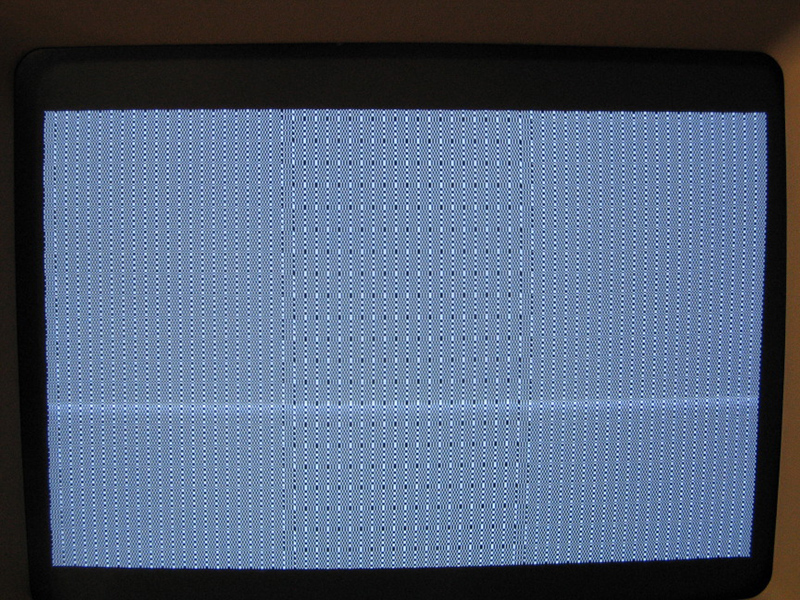
Figure 2. The screen of a Mac SE/30 running unhappily (not my photo, but mine looked just the same)
The cause
Why was I not surprised? The reason is because a whole lot of late 1980s/early 90s Mac models (including this SE/30) suffer from a fundamental manufacturing flaw. Their small barrel-shaped surface mount capacitors invariably leak..and we all know that leaking is never good! These caps ooze their conductive contents all over the motherboard, causing current to go where it shouldn't and so creating all sorts of mayhem.
Figure 3 shows part of my SE/30 mainboard, extracted to verify that caps were indeed the issue. The residue is clearly visible. In this case the cap on the left has leaked all around the chip in the middle of the photo. Other caps on the board had pools of residue emanating from them also.
The fix
There was nothing for it but to tackle a task I'd postponed for some time. Replace the capacitors.

Figure 3. Leakfest. The capacitor on the left has leaked its contents all around the chip at the centre
Now replacing surface mount devices (SMDs) was a task I'd always approached with some trepidation. The components are small, tracks can be lifted and the board damaged if extreme care is not taken. However, I'd replaced caps once before on less-treasured Mac Classic II. In that case the repair was somewhat of a hack in that the leaky SMD caps were replaced with larger and more manageable through-board caps. This worked fine, but the aesthetic of the mainboard was lost. Not only was it a hack but it also looked like a hack.
This time I decided to do it properly.
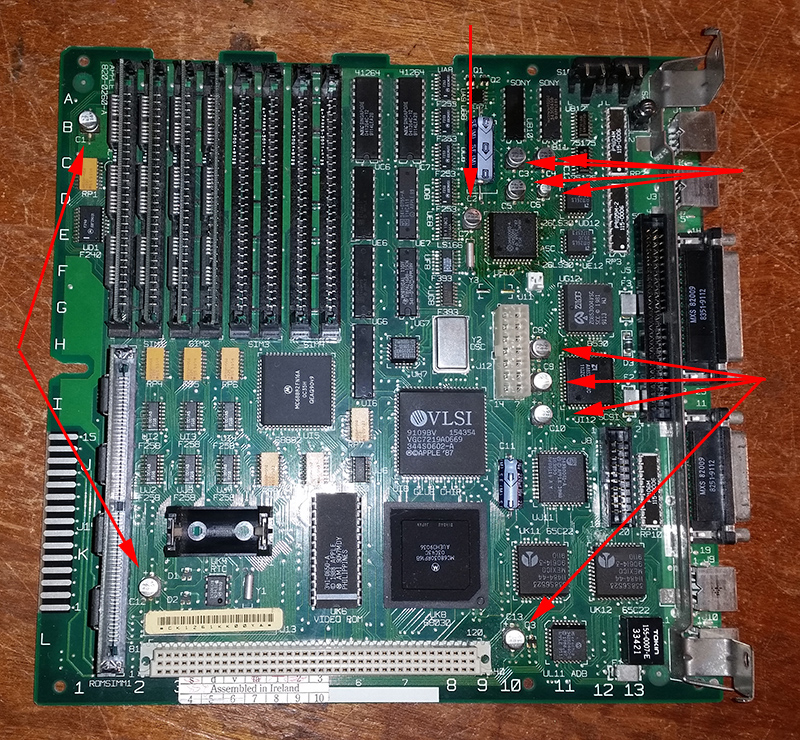
Figure 4. Eleven capacitors to replace. All were leaking.
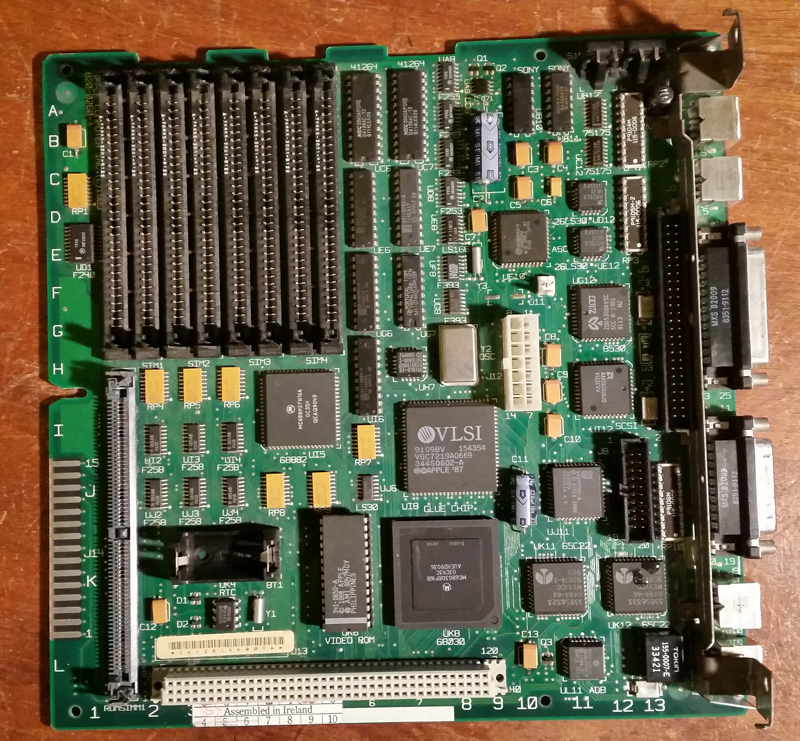
Figure 5. New SMD capacitor replacements fitted
Figure 4 shows the caps before replacement and Figure 5 shows the recapped board, this time with SMD parts. What made it possible to recap properly this time was that I had some new gear. There is no way my old $25 Dick Smith beginners soldering iron would handle this job so an inexpensive SMD rework station was secured via e-bay (Figure 6). It came with lots of accessories and once I'd figured out the intricacies of SMD reworking (through YouTube videos and websites) I was away and running.

Figure 6. The thing that made it possible. My new SMD reworking/soldering station
The workstation is going to be valuable in the future. It comes with a temperature controlled soldering iron and also outputs DC voltage up to 15 volts, which will be good for testing purposes.
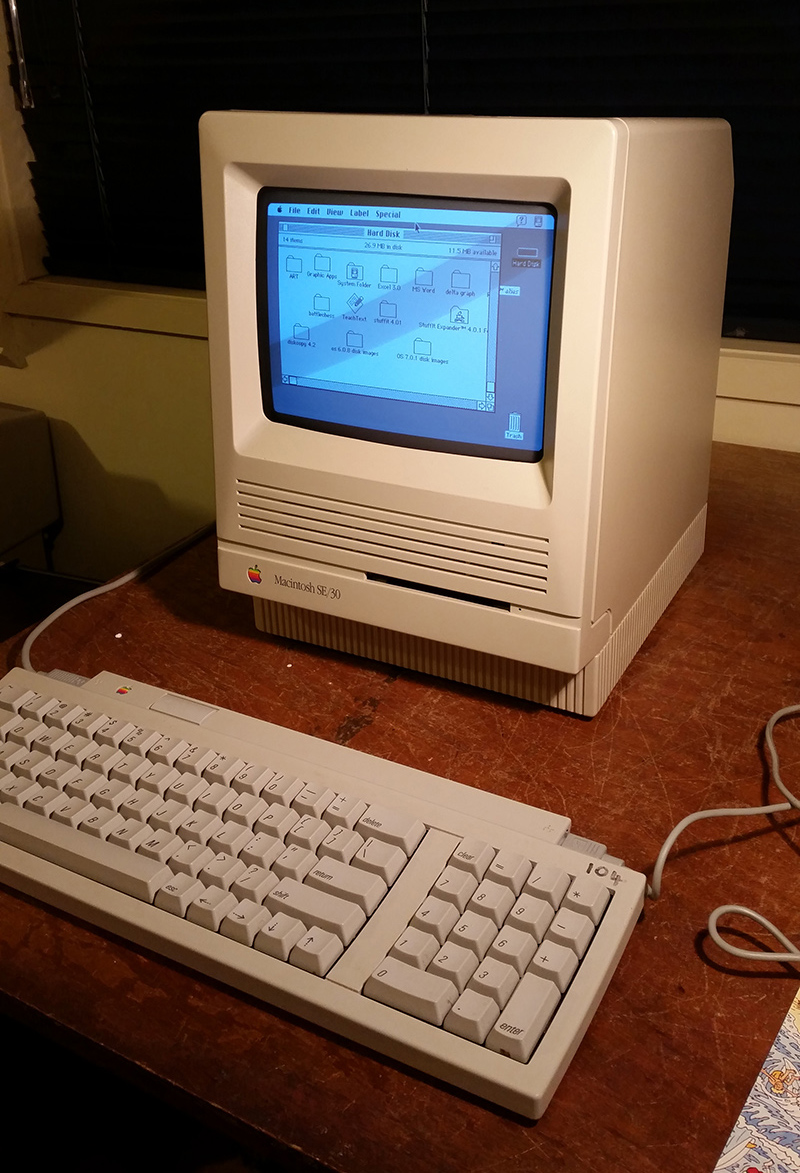
Figure 7. The Mac SE/30 - happy once again (the gray diagonal on the screen is an artifact of the photography)
Final words
The recapping certainly solved the problem. The SE/30 now boots and operates just fine. Someday I must get an Apple Extended Keyboard (M0115) for this model so it looks like the classic powerhouse it is.
Tez
27 April, 2015