Another Apple 8-bit adventure: Restoring two Apple IIe units (Part 2) - The Apple IIe (enhanced)
Introduction
This article continues the Apple IIe restoration written about previously. Just to recap, I now had two repaired PSUs, a couple of clean keyboards and cases, a IIe (standard) motherboard that didn't work and a IIe (enhanced) board with a short-circuited capacitor.
As its likely fault was apparent, I decided to focus on getting the IIe (enhanced) board back to full health.
Replacing the capacitor
Removal was easy and straightforward. I know from another repair that these "bullet" shaped caps are hard to come by but that standard electrolytics can be used as substitutes. I quickly had one soldered in (Figure 1).
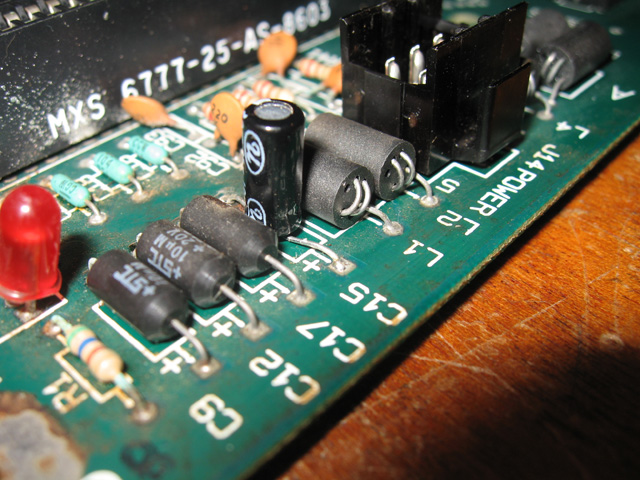
Figure 1. Sticks out like a sore thumb but it does the job!
Switch on
I wired everything up and switched on. This time the machine sprang to life! Well, sort of. What I mean is the video worked, but there was nothing there but large random squares frozen on the screen. No beep; an indication that the machine wasn't getting very far in the boot up sequence. Seems there was more work to do.
Problem found
There were several things I could have done at this point in time. The purist would have dragged out the logic probe or scope and started to work back from the CPU, checking the clock, reset, data lines etc. I'm far too lazy for that unless I'm desperate so I first decided to swap out what ICs I could from my known-good-spare platinum board starting with the 65C02 CPU.
And that, it seems, was the problem (Figure 2). Transplanting the CPU with a known good one saw the machine welcome me with the familiar Apple IIe boot message!
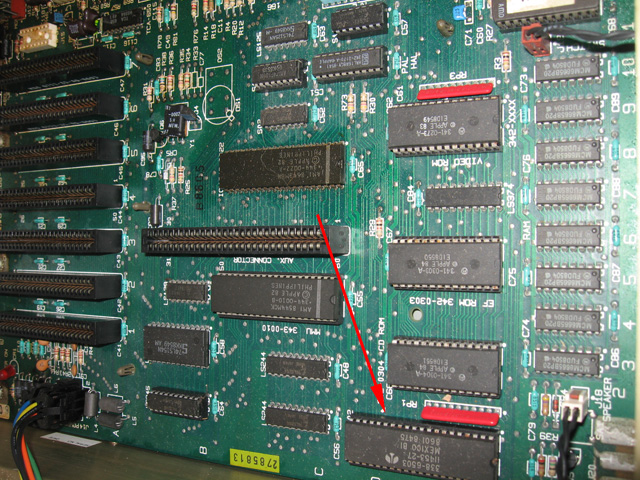
Figure 2. Diagnosis by swap-out. Red arrow shows the faulty 65C02.
Yay! This motherboard was up and running. It all seemed a little too easy...
More of the same
Indeed, my satisfaction was short -lived. While doing a few more checks suddenly I found I was back to square one. No video on power on and the PSU was back to clicking? Sounded like another short? Hmm..but where?
I decided to examine the same bank of caps that went before. Maybe an adjacent cap was damaged or became weakened when the original one blew?
My hunch was right. Sure enough, even though it appeared undamaged, a capacitor close by showed a complete short. I desoldered a leg just to verify it was the cap and not the board that held no resistance and indeed it was the cap. Soon the motherboard was sporting TWO electrolytic replacements (Figure 3). I hoped blowing caps didn't become a habit with this unit!
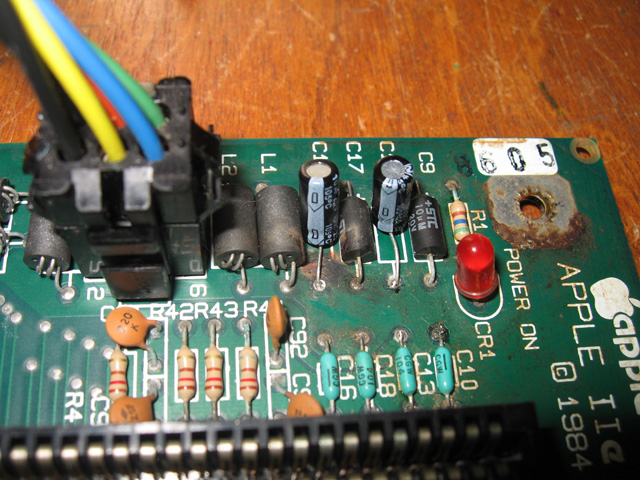
Figure 3. Now two obvious replacements!
Further testing showed the board was now fine. I installed the expanded memory/80 column card and disk II card and hooked up a known good drive and a spare keyboard. I then gave the unit a thorough hardware test using some software I had. RAM, ROM, the disk card and 80 columns and extra memory was all tested. The motherboard passed all tests without a glitch.
I deemed the Apple IIe (enhanced) board, fixed!
Testing the keyboard
Now I'd tested the motherboard and cards, it was time to look at the last bit of hardware on this IIe (enhanced) i.e. the keyboard. Initial tests were not promising. First, when I pressed down on a key the character would keep repeating until I pressed another key. I came to the conclusion that this was due to a little residual moisture and maybe I hadn't dried the keyboards as well as I should have? Perhaps they were not as dishwasher safe as I thought. This problem seemed to disappear as I exercised the keys, which further strengthened my theory.
There was another problem though. About six of the keys didn't work at all!
Fixing the keys
First I tried vigorously exercising the plunger (pulling it up and down) with the cap removed (Figure 4). This had worked well with a stuck number 1 key on the very first Apple IIe I acquired.
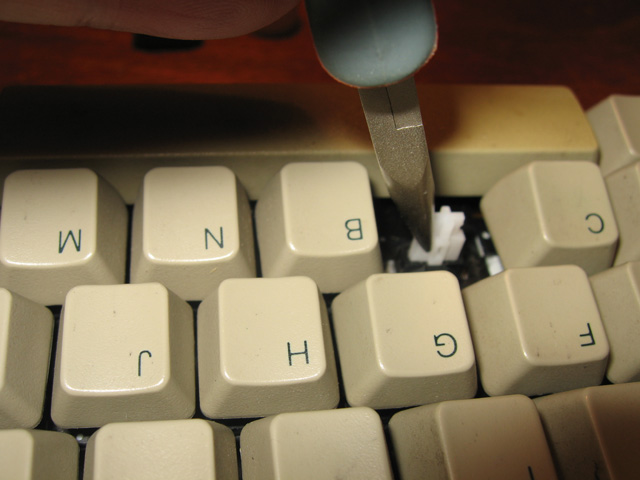
Figure 4. "Exercising" the key plunger with pliers
This seemed to cure the problem in a couple of the keys but about four others stubbornly refused to show characters. Googling around I found more extreme measures. One suggestion was to pour a little isopropyl alcohol down the side of the plunger into the key while vigorously exercising it.
I tried this and lo and behold, it seem to work. Actually it worked too well! The keys not only worked but sometimes also repeated themselves constantly similar to that described above! On reflection this may have been due to too much alcohol (and the water which was probably mixed with it) being poured down into the key and over-saturating the contacts.
Keyboard encoder issues (Bad practice maybe?)
The above procedure took place while the keyboard was plugged in and the machine was switched on. During one "freeing up" key session the keyboard suddenly stopped working. Huh? After some investigation I found the keyboard encoder IC (AY-5-3600 PRO) shown below had failed! What the?? "Oh well, these components are old. I guess they do pack up from time to time." I thought. I had another one from the spare Pentium so I just used that.
 Figure 5. Fail! The keyboard encoder IC
You can imagine my dismay about 20 minutes later when this replacement ALSO failed! Just as all the keys had started to work too!
Two failures within 20 minutes is suspicious. On reflection I've concluded that using the key alcohol wash treatment while the machine was on and keyboard plugged in was probably a BAD idea. That combined with the vigorous plunger action to get the keys working may have overloaded/shorted out the keyboard encoder. It's suspicious that BOTH went within 20 minutes of each other. I won't be doing that again! In fact I'll think twice about washing these keyboards in the dishwasher too.
At least all the keys now appeared to be working!
Status
Thanks to a 65C02 donation from my spare IIe platinum board, I now had one working IIe (enhanced) computer with 80 column/memory expansion card, printer card and drive card. I rehoused it (for now) in its original case. This had scrubbed up well and had most of its card hole covers (Figure 6) present. It looked a vast improvement to what I'd picked up (Figure 7)!
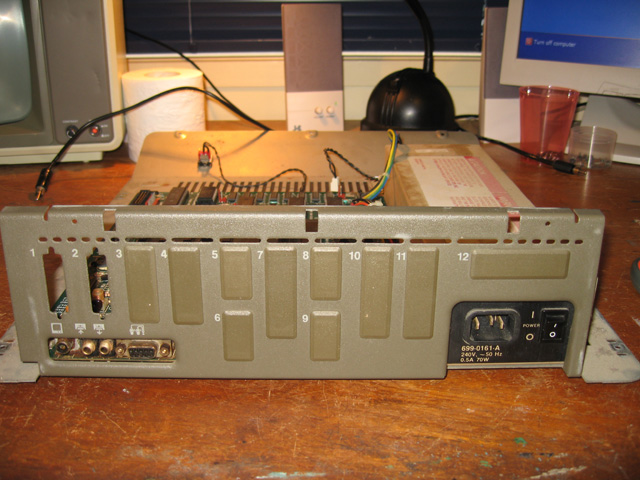
Figure 6. The rear of machine
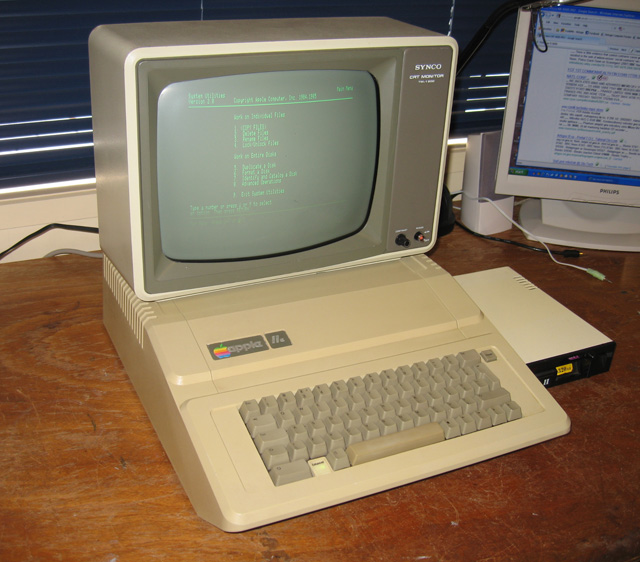
Figure 7. The clean, tidy and working Apple IIe (enhanced)
The keyboard now functioned but somehow in the process the keyboard encoder IC from this board (and my spare platinum board!) had been zapped and hence the machine was on its third encoder IC, borrowed from the as-yet-unfixed IIe (standard).
Next Step
There was still work to do. Notwithstanding the drives to check, I still had the other IIe (standard) motherboard to fix, and decide how I was going to mix and match the various parts. These first of these tasks is the subject of the third article in this series.
Tez
2nd May, 2011