Replacing the capacitors on a Macintosh Classic II
Introduction
It's a sad fact that nearly all (if not all) untreated Macintosh Classic IIs will eventually look something like the photo below. It may be vertical bars, it may be a checkerboard or perhaps simply the chimes of death. Either way, it suddenly won't work!
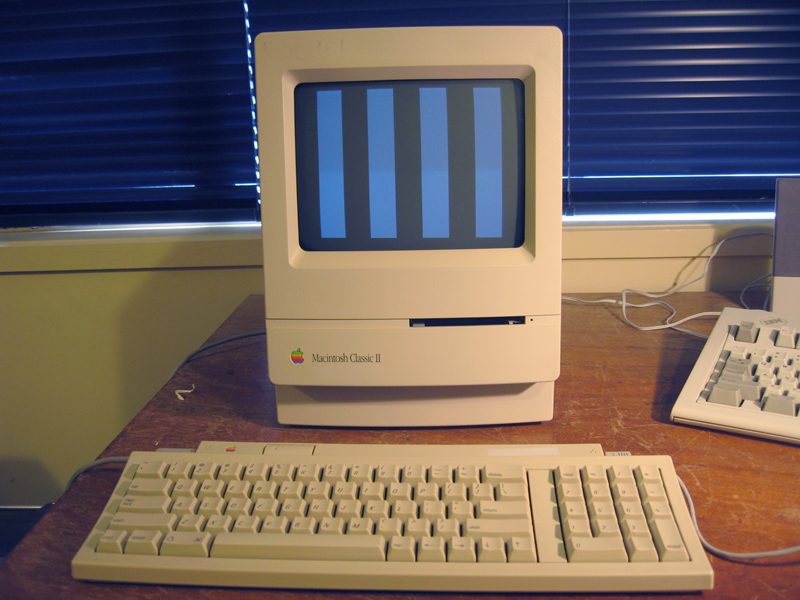
Image 1. A stalled Macintosh Classic II
The reason of course is leaky capacitors. The inferior surface-mount capacitors used in these machines eventually exude their conductive contents onto the mainboard causing electricity to flow where it shouldn't and leading to the symptom above.
A temporary fix can be had by cleaning off the exudate or even washing the mainboard. The computer above had the latter treatment a few years ago. I knew it wasn't a permanent repair though and so it proved to be. Yesterday I discovered the bars were back! It was time to bite the bullet and replace those troublesome caps.
To surface-mount or not to surface-mount?
The reason I didn't replace the caps when I first got the Classic II was the daunting prospect of desoldering/soldering surface mount components. Several years on and I'm still daunted. Some folk have replaced leaky surface-mount caps with good ones quite successfully. I wasn't convinced my $20 soldering iron would be up to the task though and wondered if anyone had replaced these caps with conventional old-skool ones.
It turns out someone had! Even better they had documented every step of the process at http://www.classicmac.net/reference/caps/. This is exactly what I wanted! (Edit 17/04/2026: Unfortunately that link is now dead! Here is a more concise alternative.)
Replacing the caps
The process is very well documented in the link above so I won't repeat it here. Suffice to say my mainboard went from this....
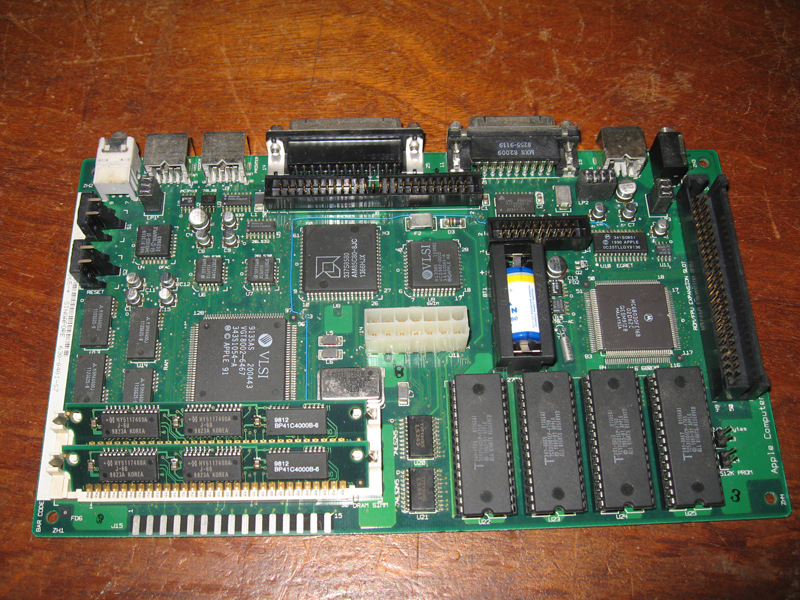
Image 2. The Classic II mainboard prior to cap replacement
...to this
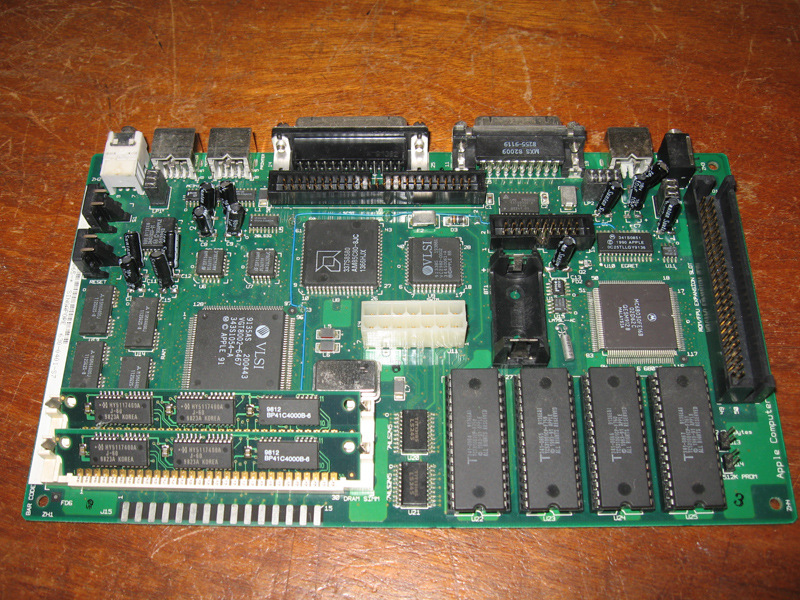
Image 3. The Classic II mainboard after cap replacement.
All in all it took me about two hours of careful work. I liked that the method didn't call for unsoldering the old caps. No, you just destroyed them and eased them off their legs. You can see the detritus of this systematic destruction below.
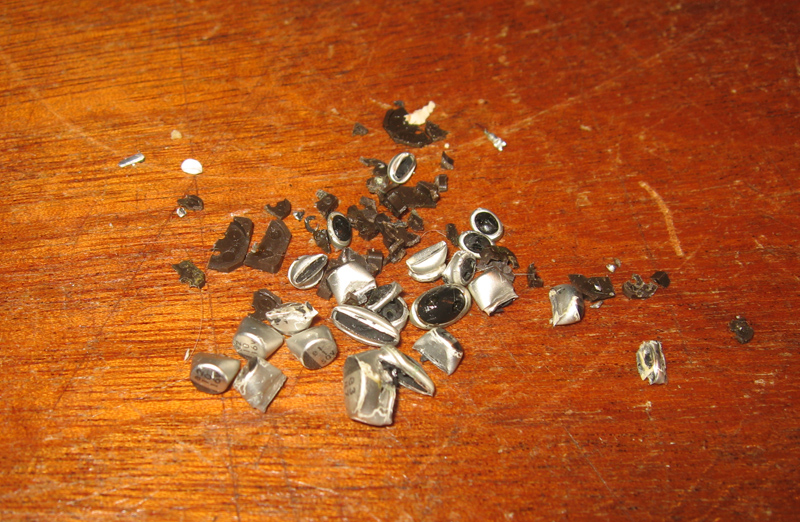
Image 4. The remains of the surface-mount caps
It was actually quite straightforward. Once I had all the caps out, I gave the board a good clean, especially those areas around the capacitors. Sure enough, more leakage was present, which had caused the current failure to boot no doubt.
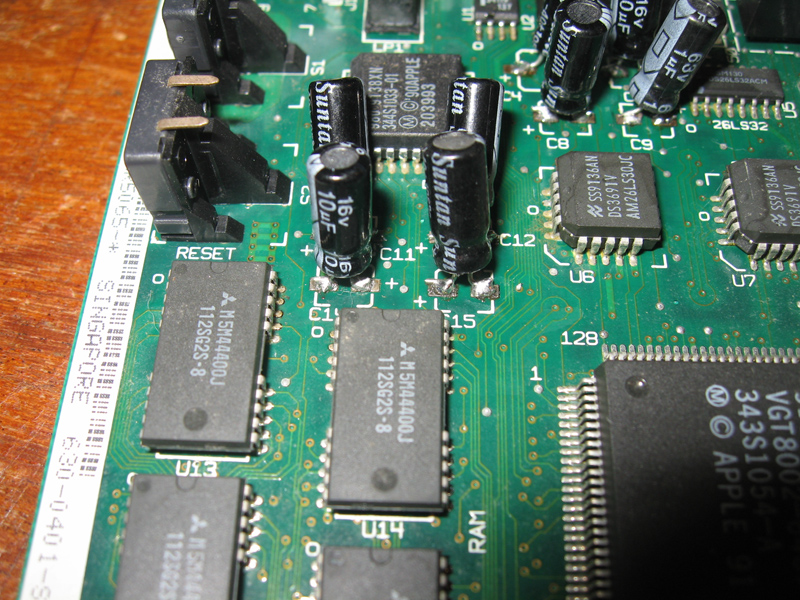
Image 5. Close up of the replacement capacitors.
After I finished I reassembled and turned on. Bong! was heard immediately and very soon a smiley mac was beaming at me.
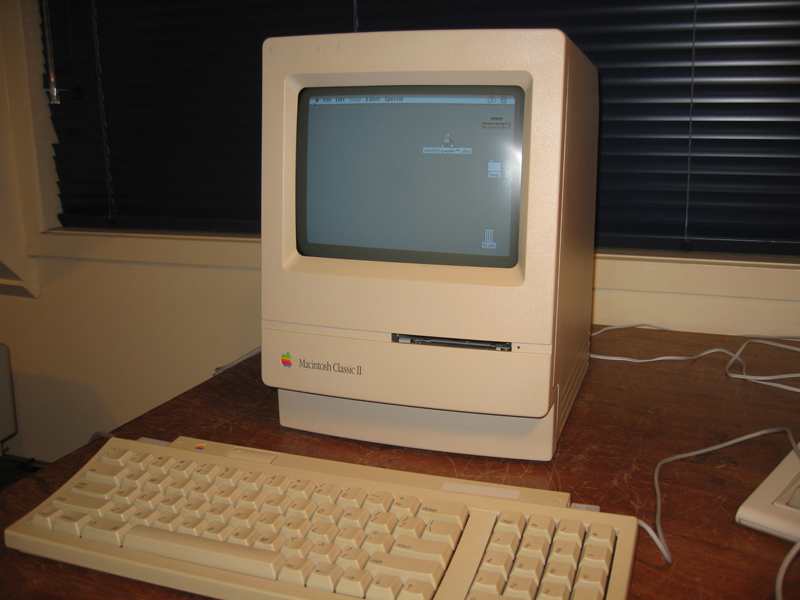
Image 6. A permanently repaired Classic II
Leaky caps on the Classic II are now a thing of the past. Many thanks to www.classicmac.net for the method.
It should be noted that others have done a similar thing with tantalum caps rather than electrolytics. These components appear to work just as well.
A good afternoon's work on a wet weekend.
Tez
24th May, 2014